before and after: vintage plastic necklace
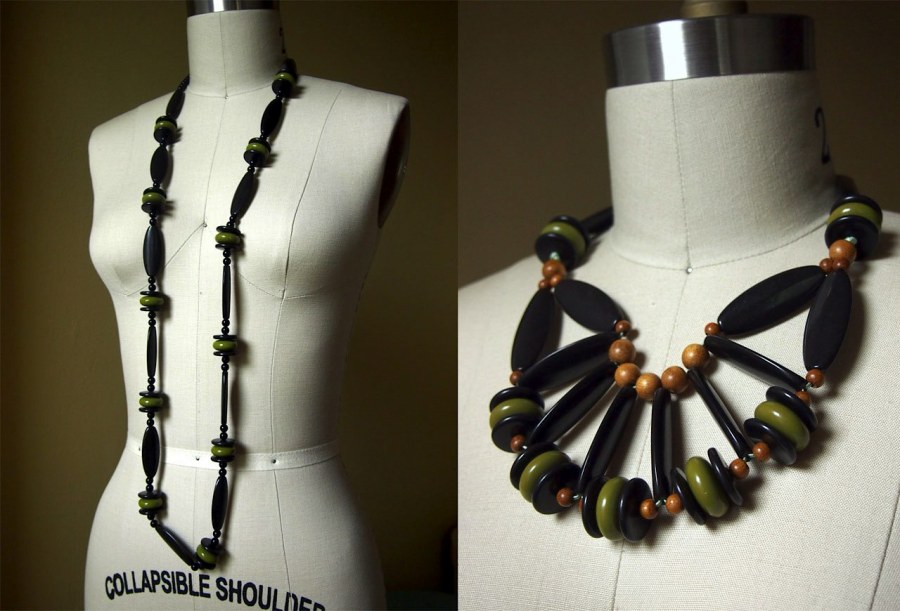
reconfiguring a flea market find.
this sweet plastic necklace was scored last fall at roger's flea market- not so much for the style, but for the beads. it seemed a shame to bust up a nice long necklace, but after hanging around unworn for over 9 months, it was obvious that an update in silhouette was needed before it would see daylight.
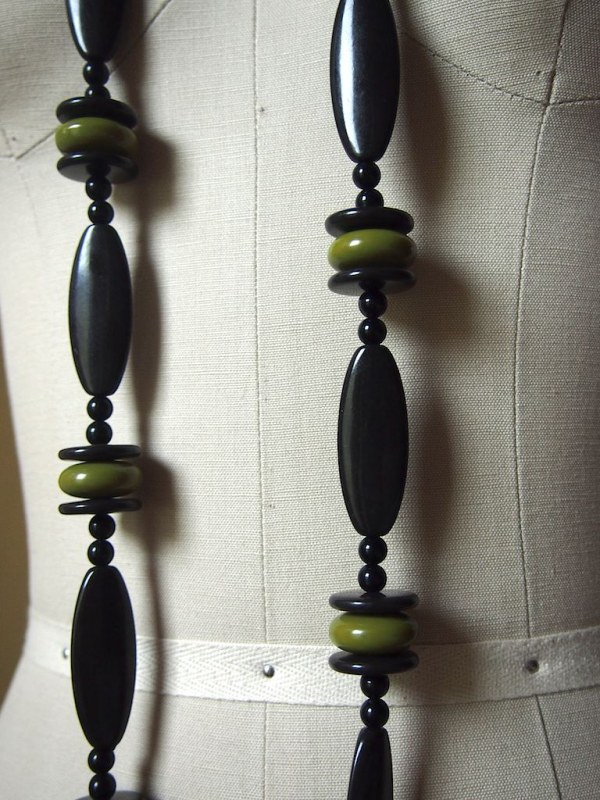
when setting up a necklace design, it's important to lay out the materials and try stringing it up. typically, the first trial doesn't live up to your expectations. don't get discouraged! if it's frustrating you, put it down and work on something else. the second time around, i was much happier with the shape, but not so much with the texture and color- very shiny and very dark. replacing the small black beads with nangka wood in two sizes, and changing the cord to a mint color lightened up the piece significantly.
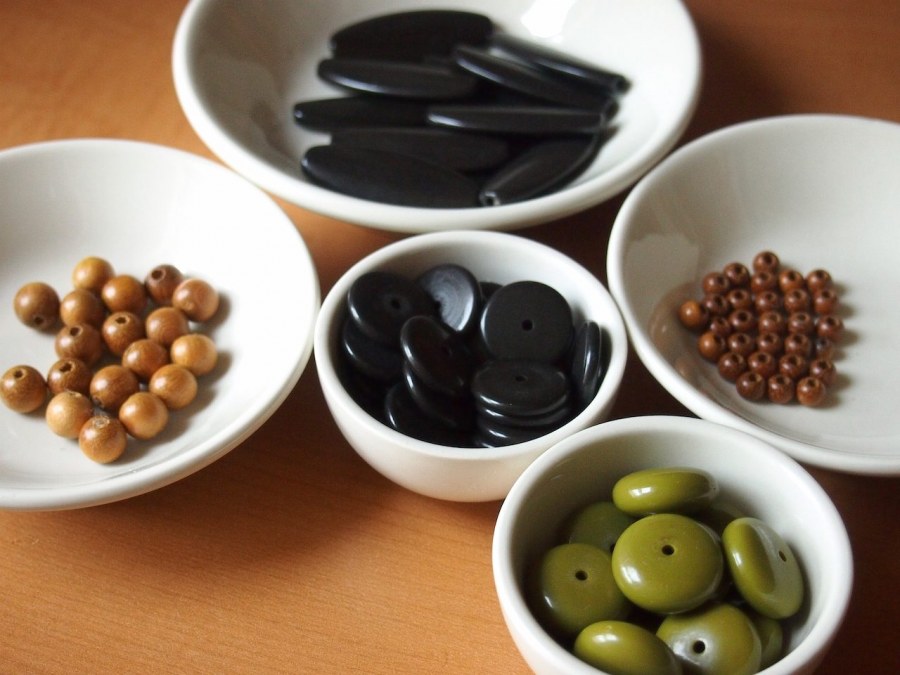
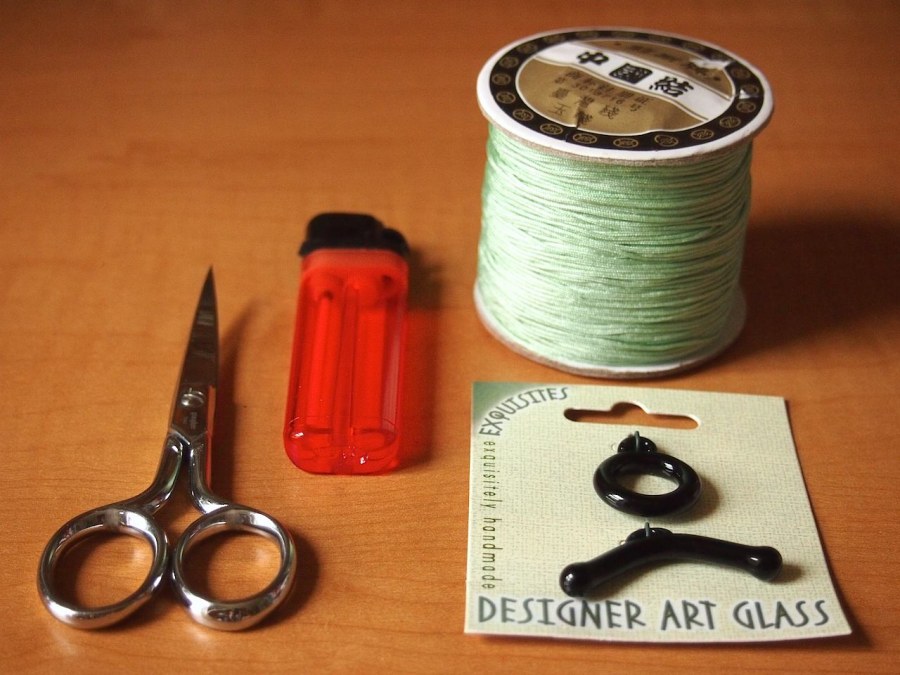
in addition to the beads, scissors, a lighter (or glue), 1mm chinese cord, and a glass toggle made it come together. a toothpick or pointed tweezers come in handy when tying the overhand knots too.
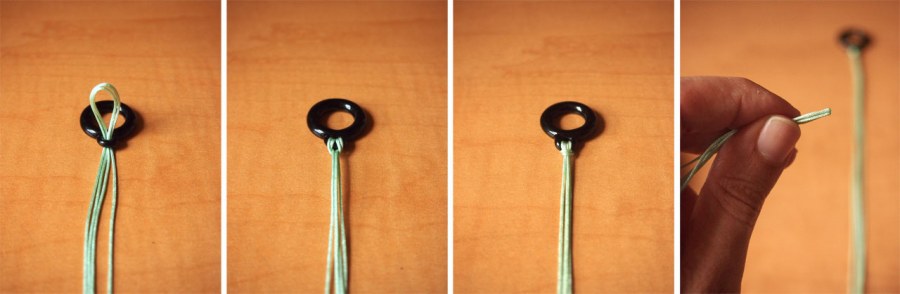
- cut 2 long cords, and fold in half. attach one side of the toggle to the center of the strands using a larks head knot.
- using the lighter, very carefully melt the tips of the 4 strands and press them together. if you're nervous about burning your fingertips, you can glue these strands together.
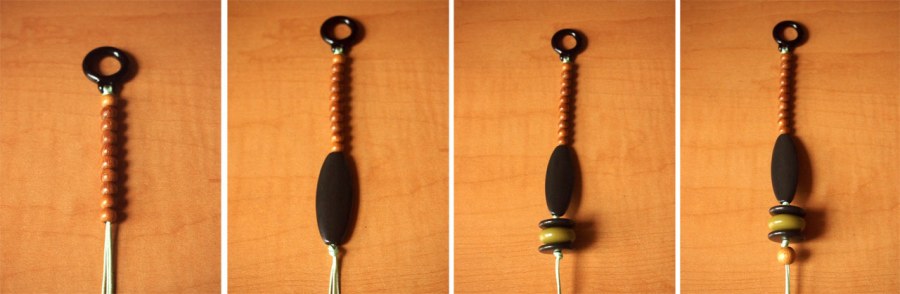
- string all four strands through the first beads. these will most likely not be visible from the front. adding overhand knots to this part of the necklace is good for a few reasons: if the cord is contrasting, it adds a hit of color. adding knots while stringing beads gives the piece flexibility and drape. knots lengthen the overall piece, with the added expense of additional beads.
- for tips on how to tighten knots up close to the beads, check out this tutorial.
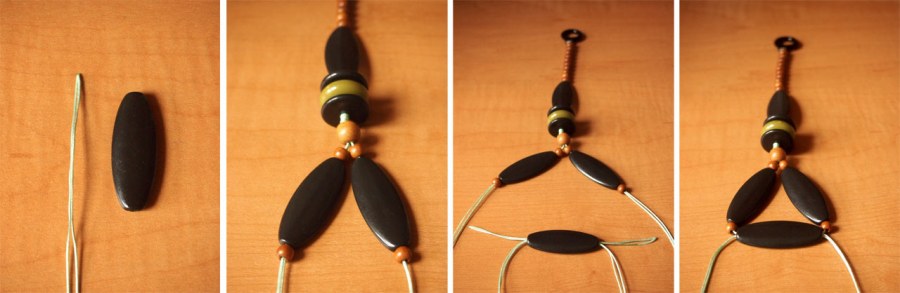
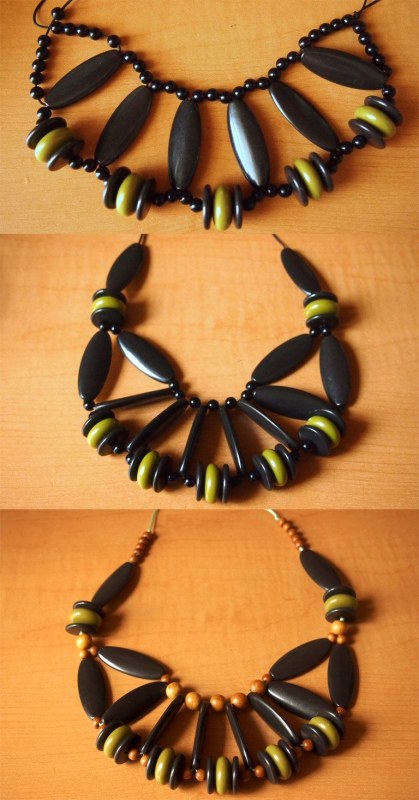
- when you're ready to start the bib part of the necklace, split up the cords. since my cords were thin, i used 2 for each side. when doing this, it's important to heat up the cords and press them together (or glue them). when using long beads, it helps to heat (or glue) a bit longer than the length of the longest bead.
- when ready to add the central beads, thread it on one side of cord. then thread the other side of the cord through in the opposite direction.
- once the cords are pulled tight, the bead will stay in a perpendicular angle to the previous beads.
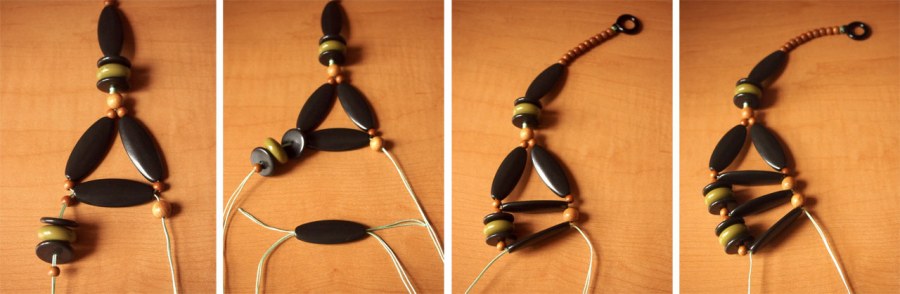
- to create a fan shape, use a different width of beads on the top and bottom. add another perpendicular bead the same as the first, by stringing each cord through in opposite directions.
- continue to alternate top and bottom beads with perpendicular ones until the desired width is achieved. i prefer to use an even amount of perpendicular beads and an odd amount of top and bottom ones, so that the center is the top and bottom beads. these are usually the focal point.
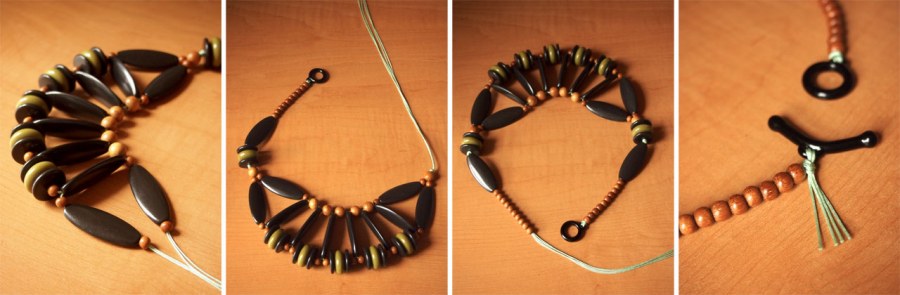
- once the bib is complete, finish the second side to mirror the first.
- attach the other side of the toggle with an overhand knot (you can glue it, if you're nervous about stability). the cords can be tucked into the last few beads and trimmed to be invisible, but i liked the color and decided to leave a little tassel. either way, you should melt the tips of each strand to prevent fraying.
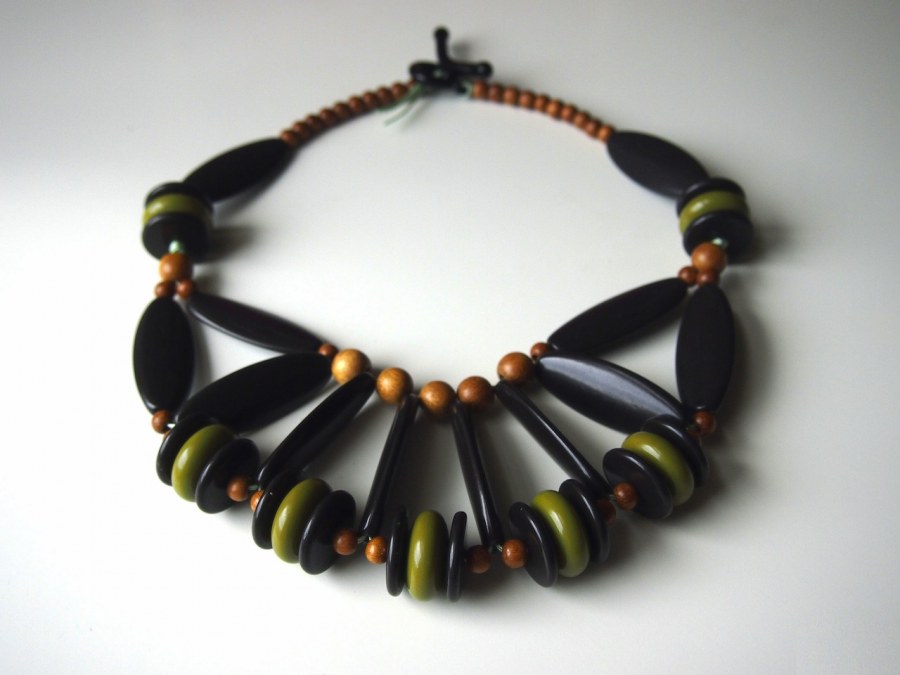
and there you have it. looking back on the photos, i might actually prefer the all black version better than the wood. one of the great parts of practicing the layouts is that it becomes easier every time you string it. i was down to 40 minutes for the last one, and that included taking photos, might be time to break that record...
