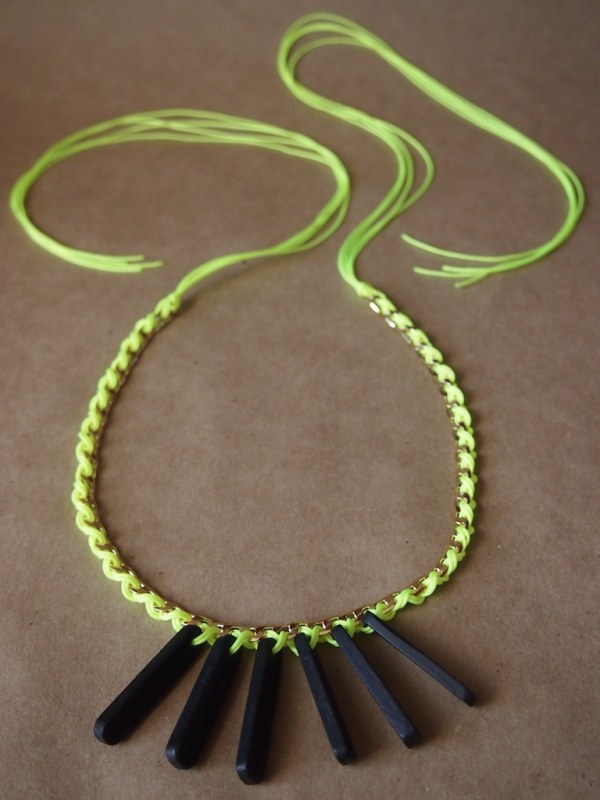
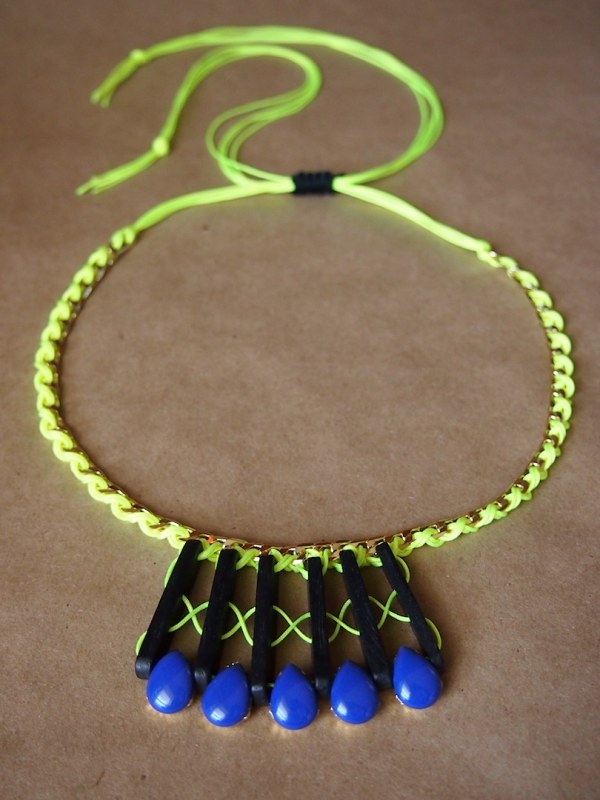
crossed cord necklace
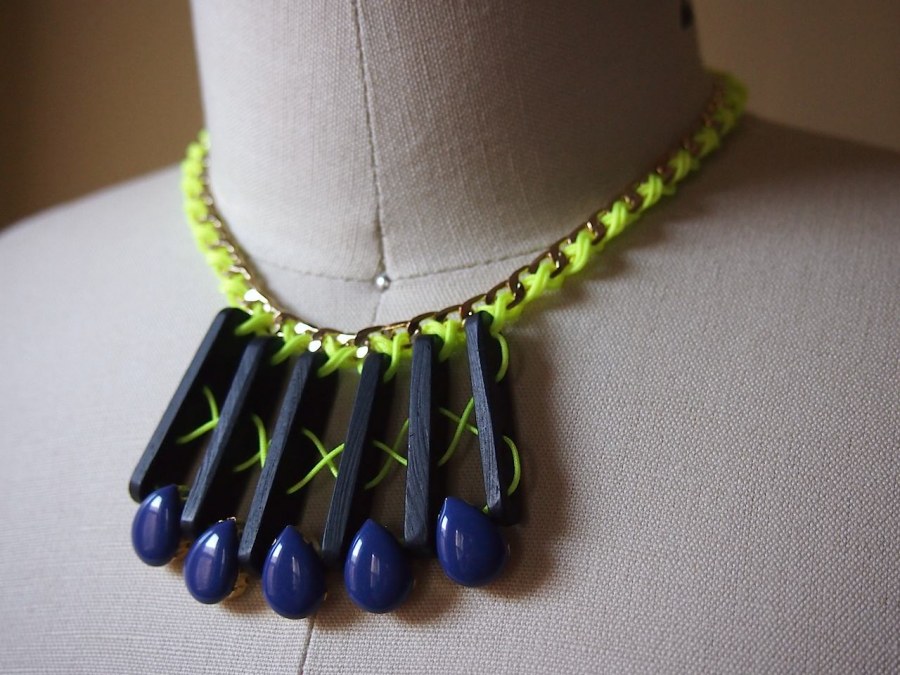
a glimmer of chain, mini monoliths fanned with pronged tears, and a healthy dose of braided neon.
my primary requirement for this necklace was that it be super adjustable- close to the neck when it's worn against the skin, and longer for when it's worn with collared shirts. the solution was in an old macrame technique common for adjustable bracelets- long tails held together with square knots. if you prefer to have it at one fixed length, or don't fancy the long cords hanging down your back, feel free to add a regular clasp to the chain.
materials and prep:
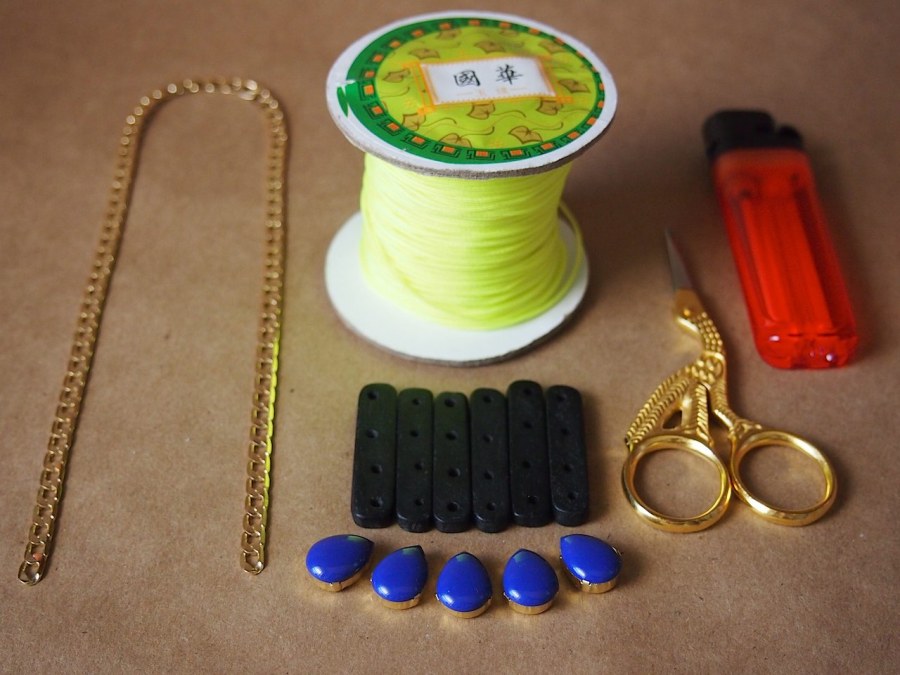
- flat bracelet chain (this came from beads world in manhattan. if i find any online, i'll post a link), cut to the shortest length you want
- 1mm chinese cord
- 6 4 hole bone spacers (these came from ebay awhile back, but they're quickly found in a google search)
- 5 tear drop gems, or beads (also from beads world)
- small scissors
- lighter
- tapestry needle
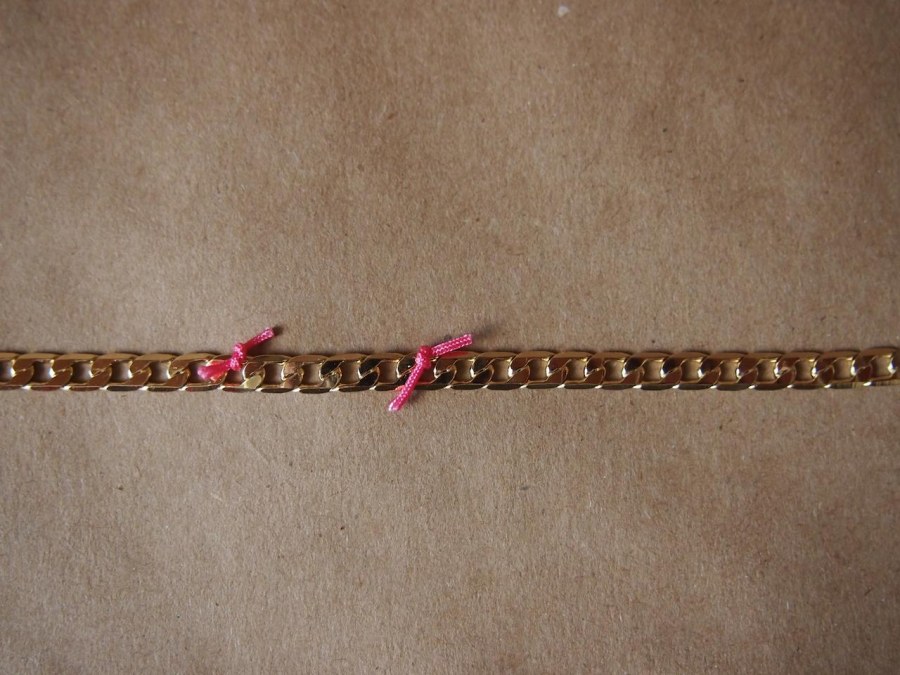
- find the center link in the chain. mark it with a small knot. count 5 links to the left of center, and mark that with a knot too.
- cut 4 lengths of cord, 4 times longer than the chain. singe the ends of each with the lighter for a moment to melt the tip and prevent fraying.
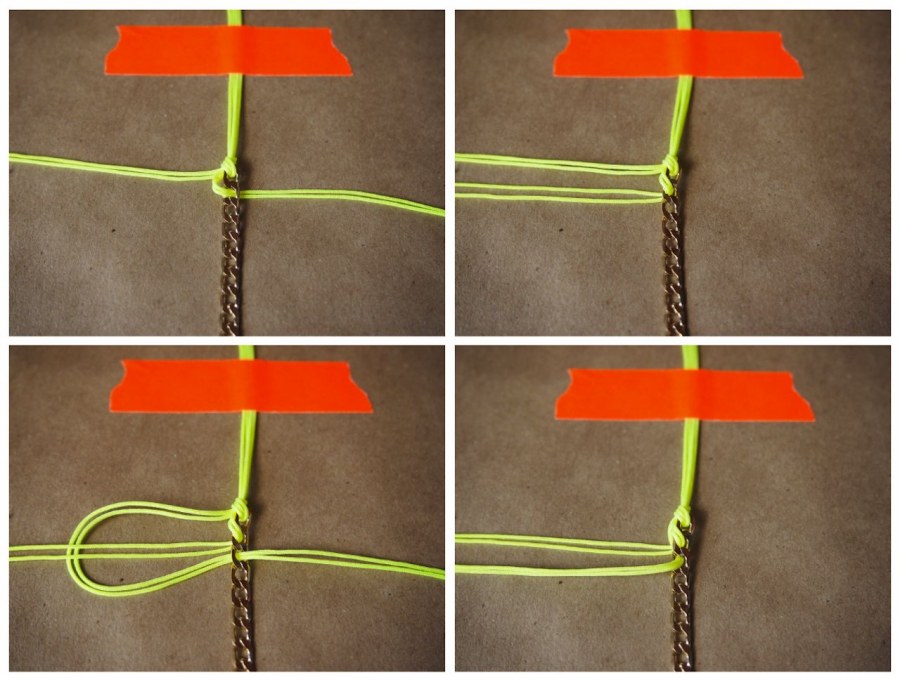
tie off the first knot:
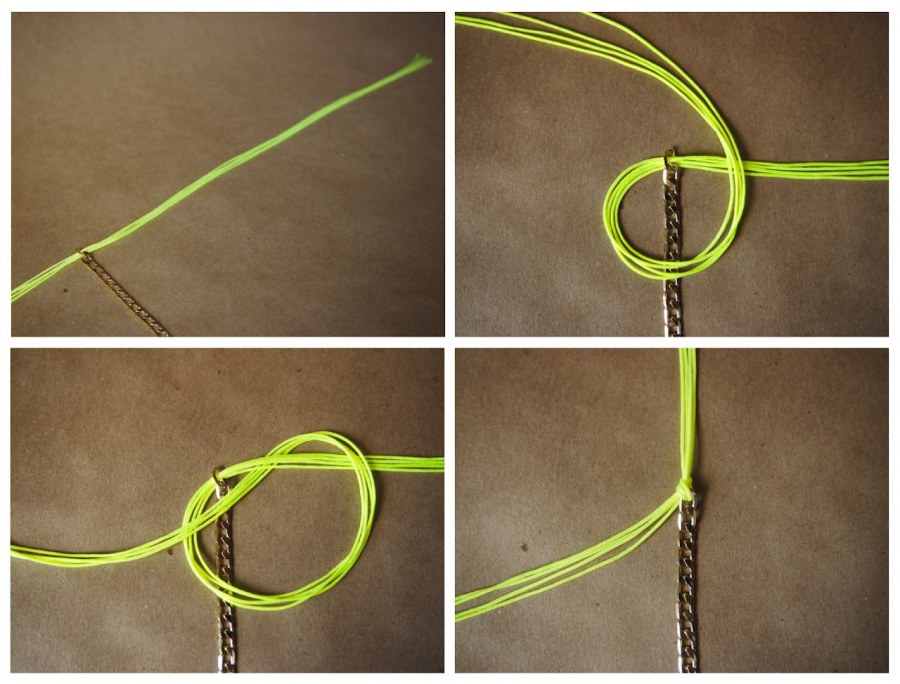
- line up all the ends of the cords. slide them through the last link of the chain (left of where the center is marked), leaving about a 12" tail.
- loop the longer side of the cords over the chain and tail.
- slide the cords under the tail, and over the chain and loop.
- pull tight, leaving the tail in line with the chain, and the longer cords to the left of it.
braiding the chain:
note: i taped the tail to the work surface because it was easier to photograph that way. i was more comfortable holding the chain while braiding it.
- draw 2 cords through the first open link on the front side, and bring them back around to the left.
- cross the other two cords under the first two, and draw them through the next open link on the back side. bring them back to the left.
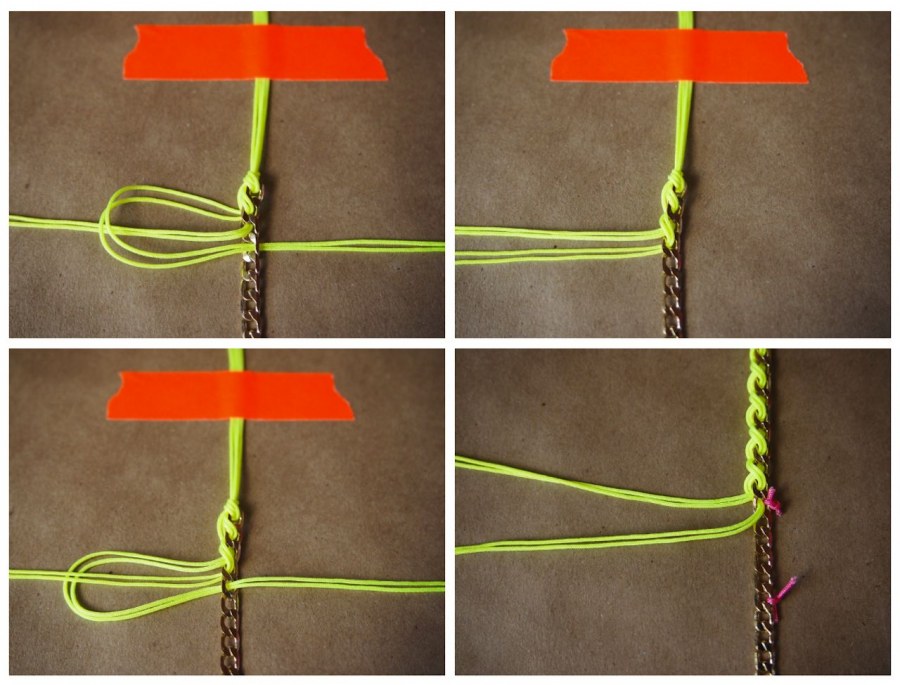
- cross the first two cords over the second and draw them through the next open link on the front side. bring them back to the left.
- cross the second cords under the first and draw them through the next open link on the back side. bring them back to the left.
- continue this pattern of braiding until the cords come through the first marked link. hit the pause button, and get out the spacers.
adding the spacers:
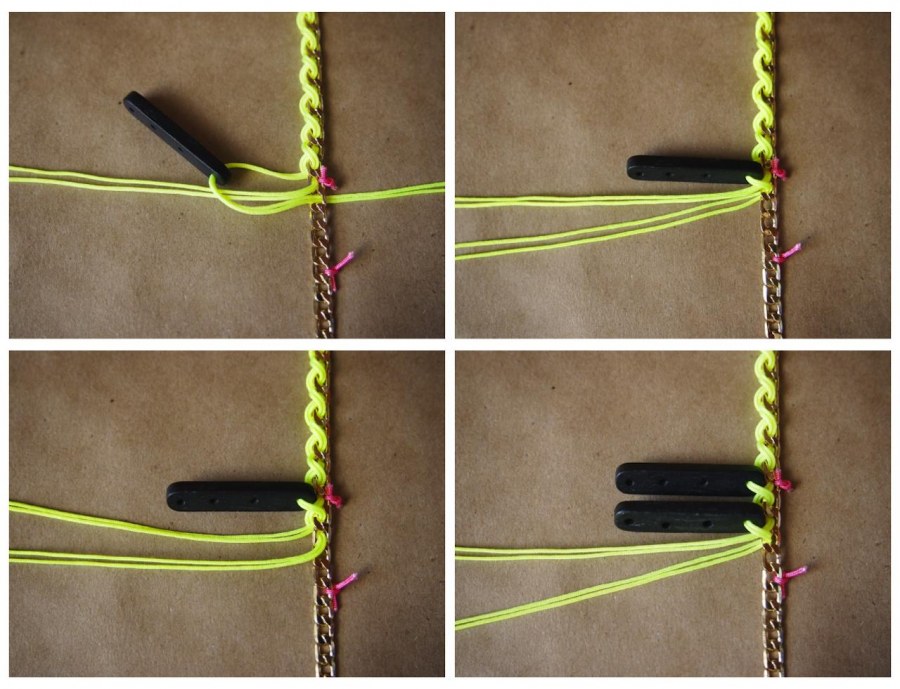
- add the first spacer to the strands that cross over the ones coming from the marked link. so, the strands with the spacer will be coming from the link before the one that's marked, and go into the link after it. the spacer should sit right below the marked link.
- braid the next two cords the same way as before, without adding anything. add a spacer to every other round, and you'll notice that the spacers are all on the same two cords, and should all sit on the same side of the chain.
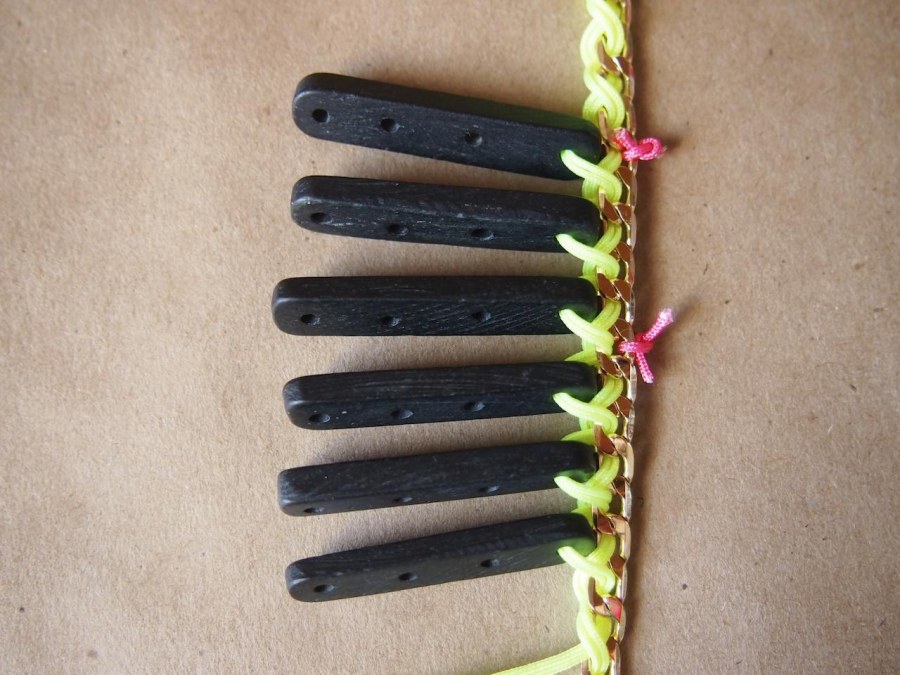
- the center link should sit between the middle two spacers. once all the spacers have been added, continue to braid the rest of the chain, tying an overhand knot at the end the same way as at the beginning.
adding beads and crossing cords:
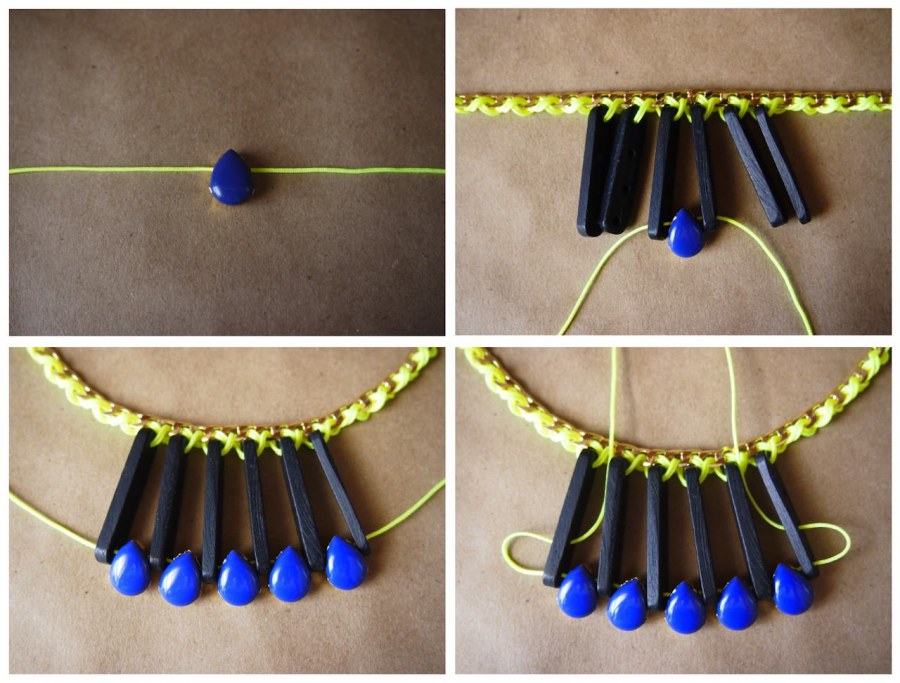
- cut a length of cord about 2 feet long, and singe both ends carefully for about 1" at the tip. this should harden the cord somewhat, so make sure it stays straight. string the first bead on the cord, and center it.
- place the bead between the middle 2 spacers, and thread the cord through the bottom hole of each.
- continue to string the beads between the spacers until reaching the end spacers.
- on the outside of each end spacer, pull the cords through the hole just above where they came out.
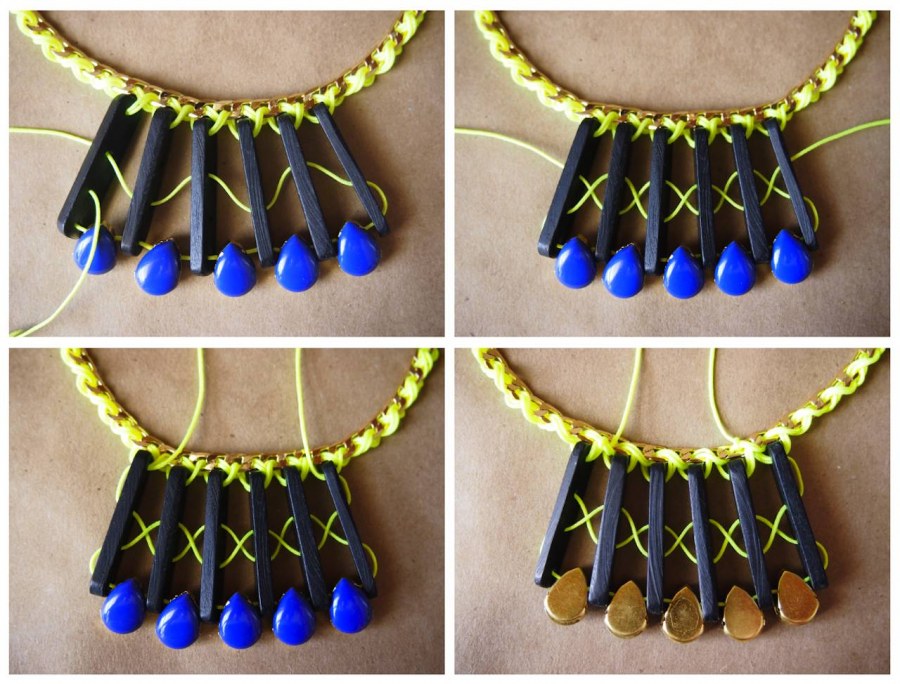
- zigzag the cords through the second and third holes in each spacer in one direction, then in the other.
- on the outside of each end spacer, pull the cords through the hole just above where they came out.
- follow the tracks of the previously braided cords, to bring the cords to the back side of the chain. tie off each cord and weave the ends through the braid to hide the tails. trim off the excess, and very very carefully, melt the tips with the lighter. press the melty tips to the braid to secure them.
finishing clasp:
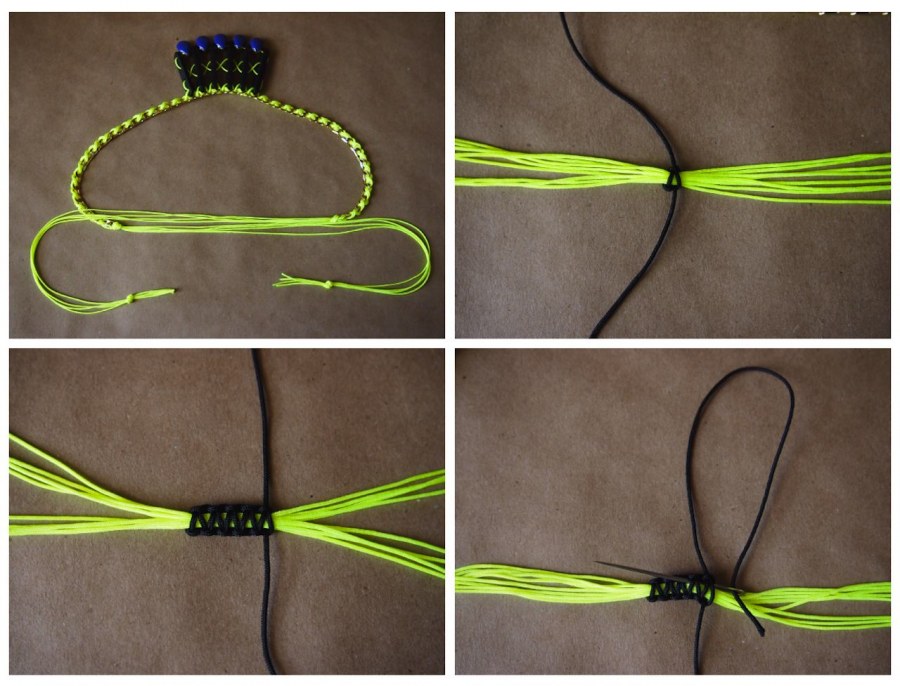
- trim the cords on each side evenly. tie an overhand knot at each end, leaving a small tail. lay out the necklace so the tails lay side by side, facing opposite directions.
- cut another length of cord (it can be the same color, but contrast helped illustrate the process better). tie a square knot around all the center cords. for instructions on how to tie a square knot, click here.
- add at least 5, and up to 12 square knots.
- use a tapestry needle to hide the tails back in the knots. trim the excess cord, and very very carefully, melt the tips with the lighter. press the melty tips against the knots to secure.
finito:

