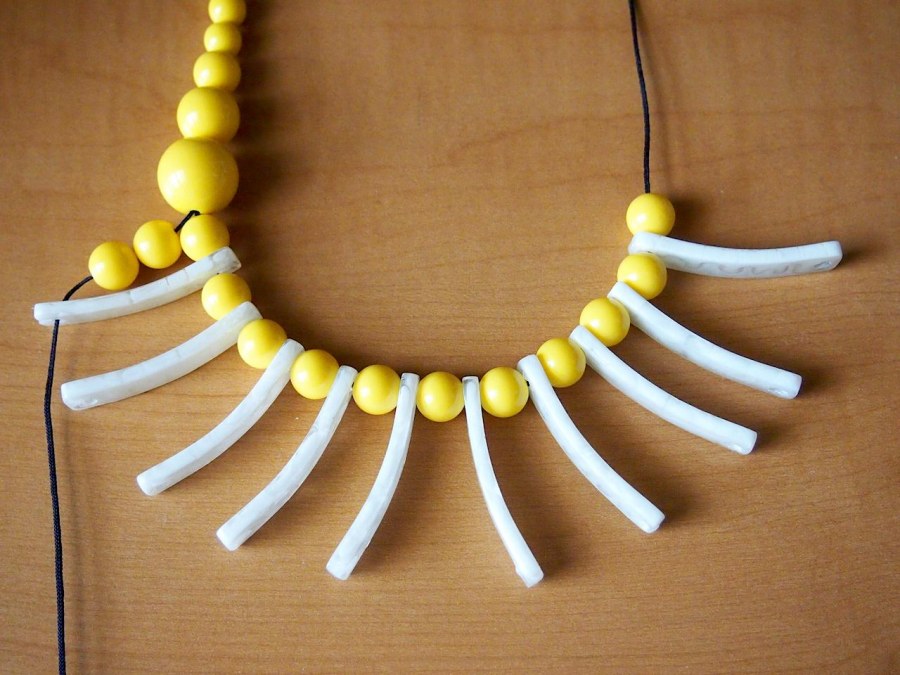
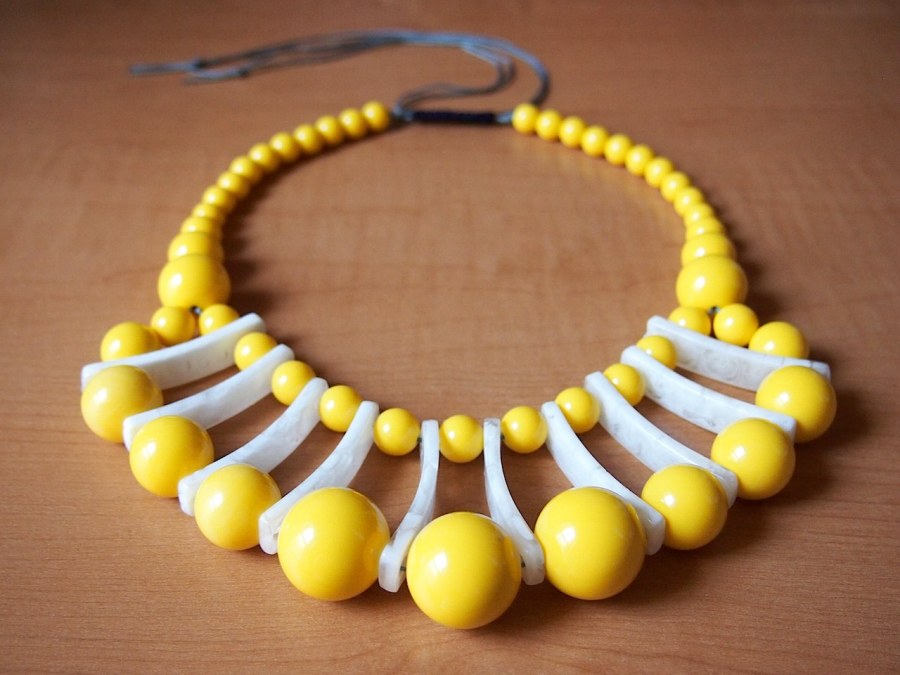
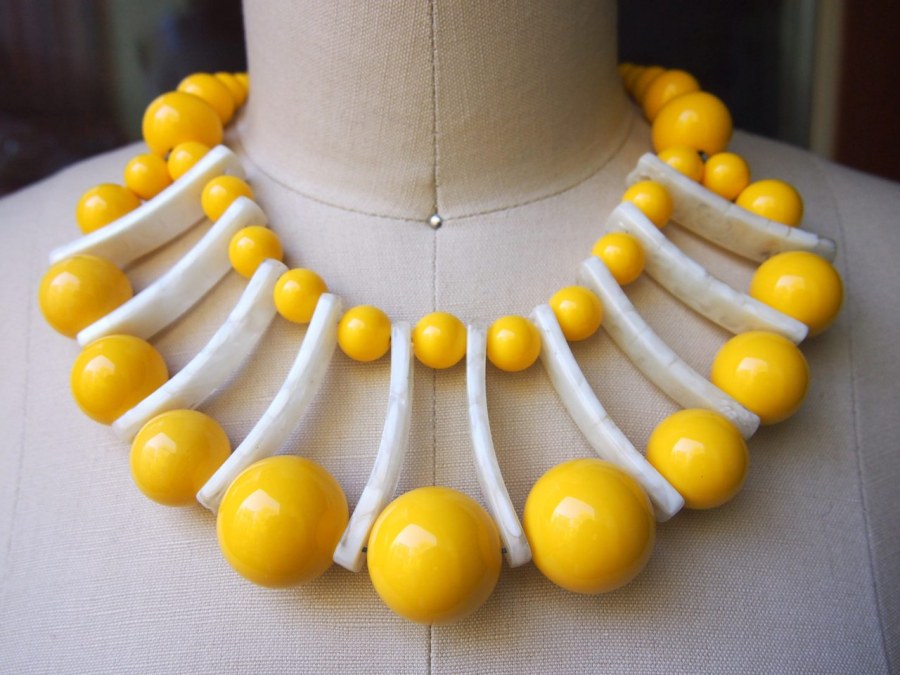
swirled double strand
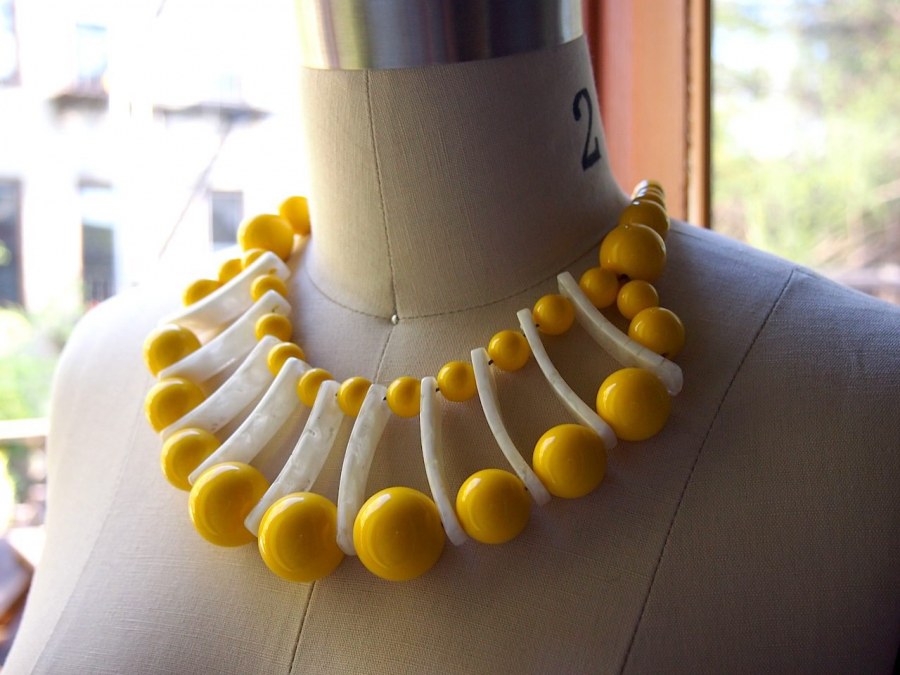
a cheerful take on the classic double strand.
there have been quite a few double strands knocked out in the past year. the first ones were strung on ribbon, followed by a couple sparkly numbers strung on chain. a very patient friend has been longing for the original for some time, and after many trials of swirled spacers, i was able to scrap together enough good ones to make her dreams come true.
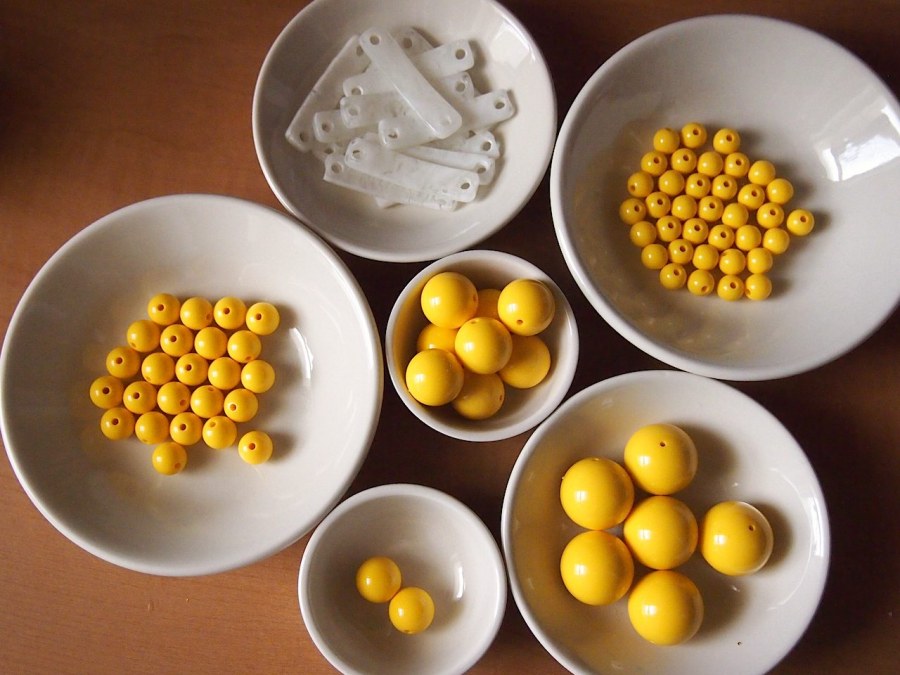
i had many different sized beads on hand, but in reality it only takes 2- a big and a little. beadaholique has a good selection of acrylic beads to choose from. i've been super happy with the last cord adjustable necklace, so instead of the ribbon, this one uses the same technique. (halfway through making it, i changed my mind about the color) if you'd like to replicate this one exactly, the stats are as follows:
- 10 spacers
- 20 10mm beads
- 15 12mm beads
- 4 16mm beads
- 8 20mm beads
- 3 25mm beads
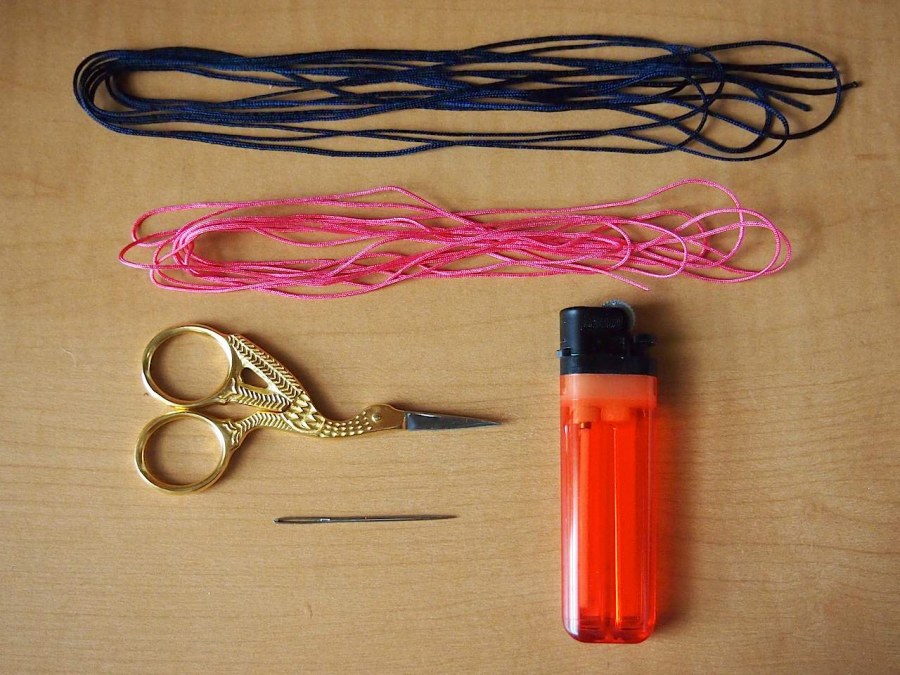
- 1.5mm chinese cord
- scissors, lighter, tapestry needle
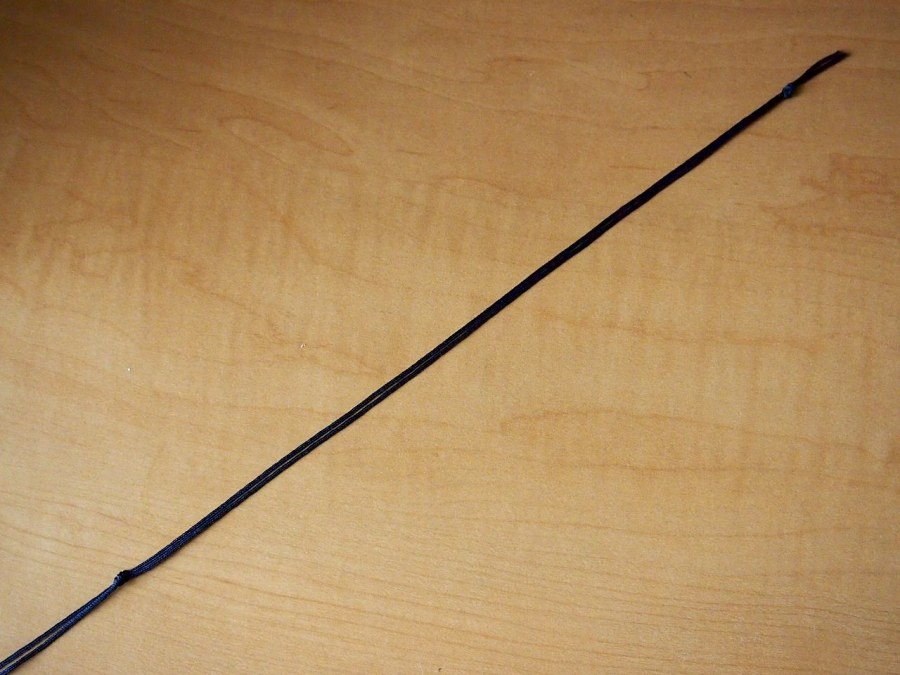
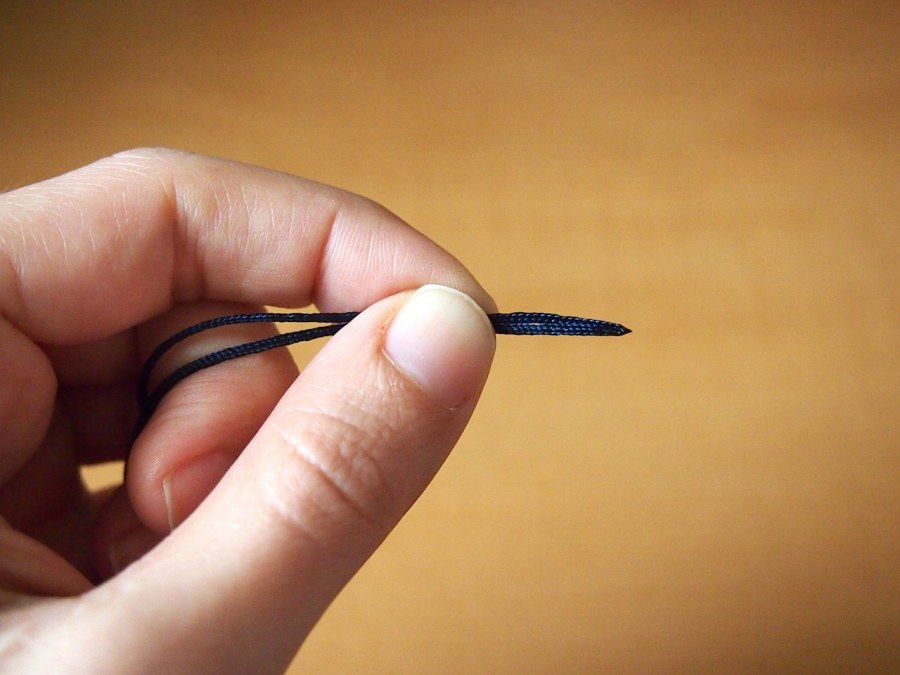
- cut 2 strands of cord about 5ft long. tie them together at one end with an overhand knot, leaving about 1" of tails. heat the tips of the cord with the lighter to singe the ends and prevent unravelling. move down about 10" and tie another overhand knot.
- with the lighter, singe the other end of the cord tips and press them together while they're melty.
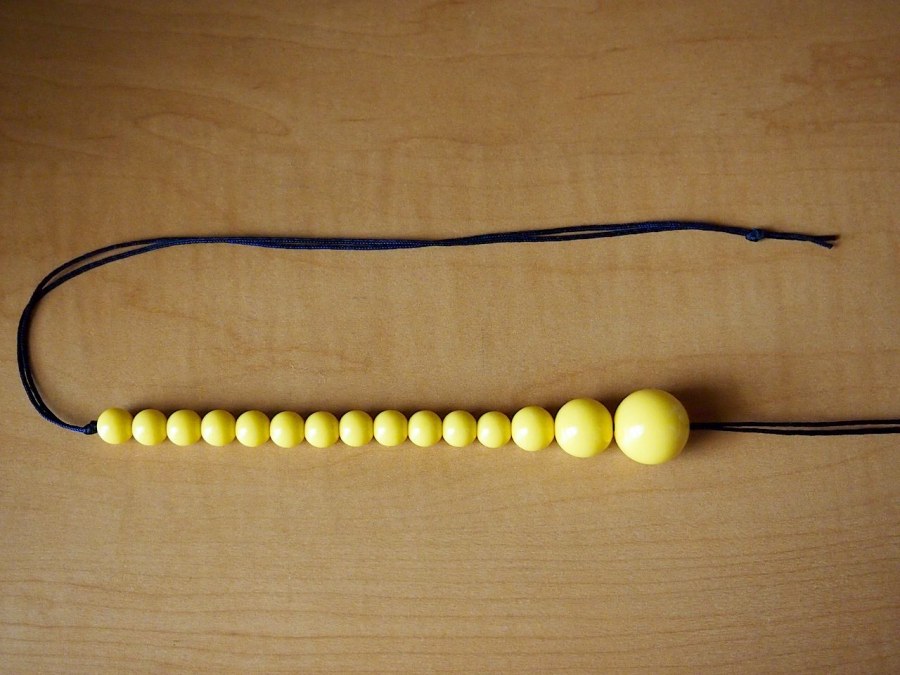
- string the smallest size beads on both cords, increasing the size of the beads at the end. the best way to determine the length is to just guess and string the whole thing together and try it on. note any necessary adjustments and rip it apart if it's too small or too long. honestly, it takes about 20 minutes to string it, and a practice round really doesn't hurt.
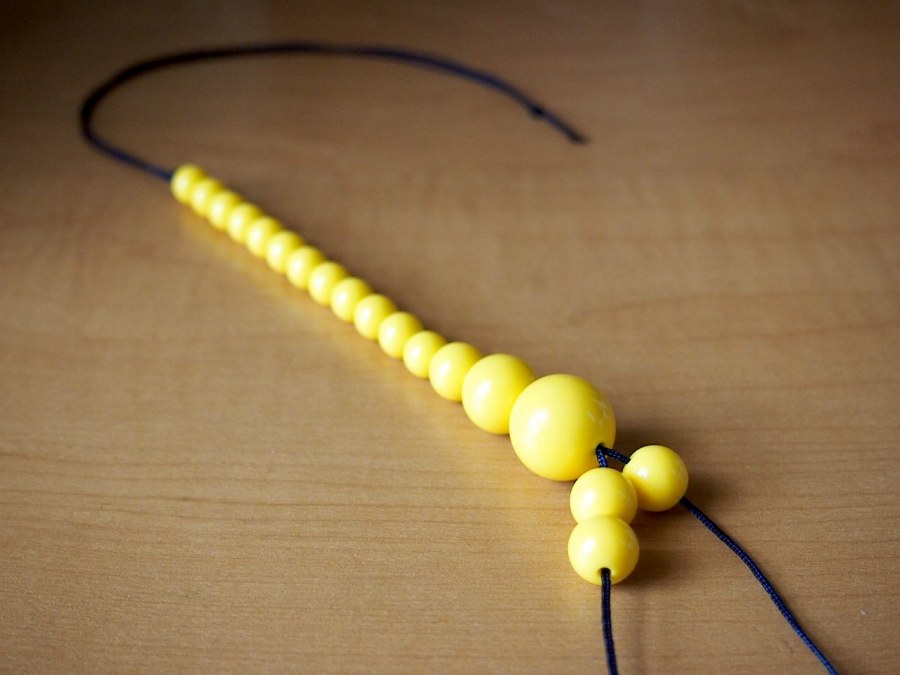
- when the sides are the length you want, cut off the ends of the cords just below the melty part. singe each cord separately. add a bead to one cord, and two beads to the other cord.
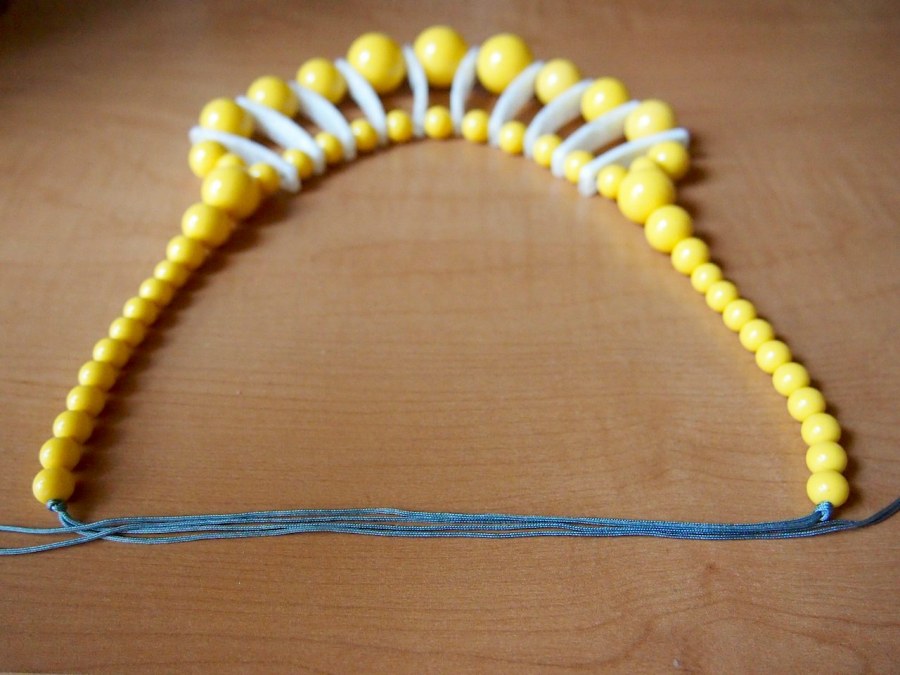
- slide the first spacer onto the cords (if your spacers are curved, the curve should face out).
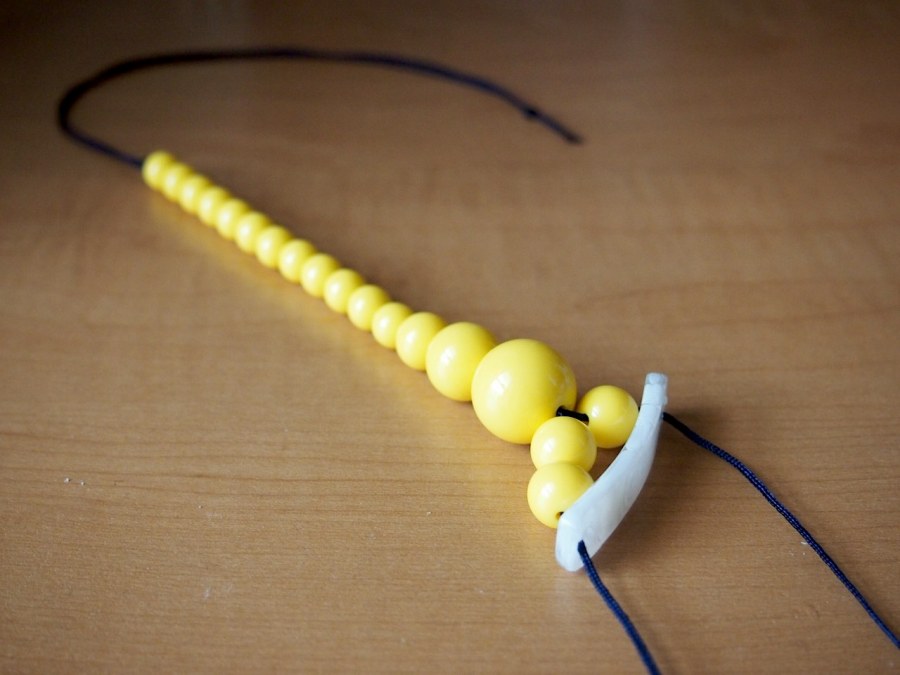
- proceed to string the top cord, alternating between the smaller beads and the spacers. at the halfway point, reverse the curve of the spacers to face the other direction.
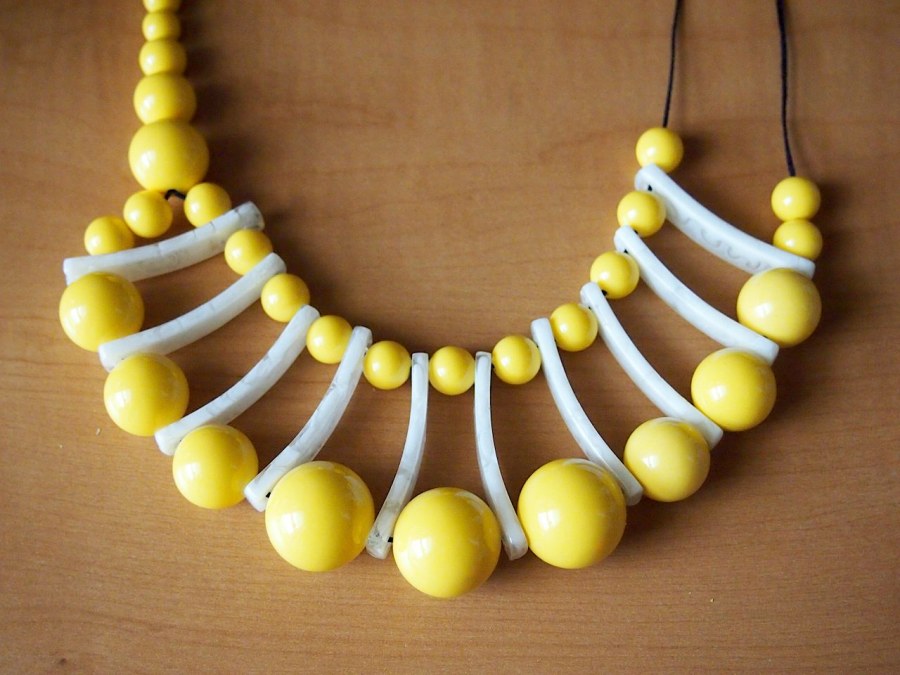
- string the larger beads on the bottom cord, alternating with the bottom hole of the spacers. this piece had both the 20mm and 25mm beads at the bottom, with the largest ones centered.
- after the last spacer is added, string a smaller bead to the top cord and two beads to the bottom cord. the length of the cords will be different at this point, so trim the longer one to the same size as the shorter. melt the tips again, and press them together.
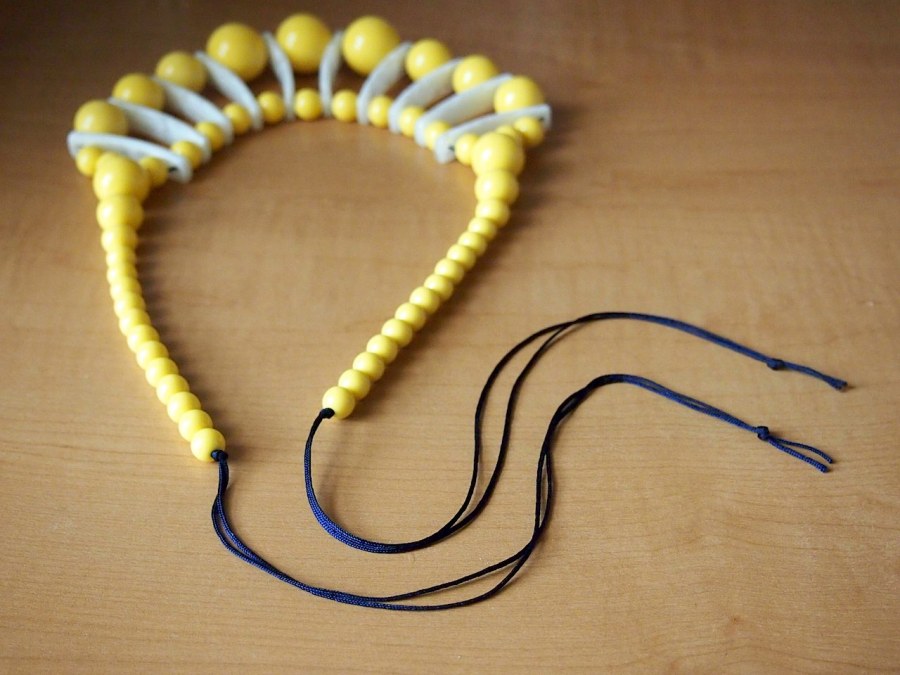
- string the rest of the beads on both cords, mirroring what is on the first side. tie an overhand knot to keep everything together, and another about 10" from the first. try on the necklace and make sure you're happy with the length and overall look of the piece.
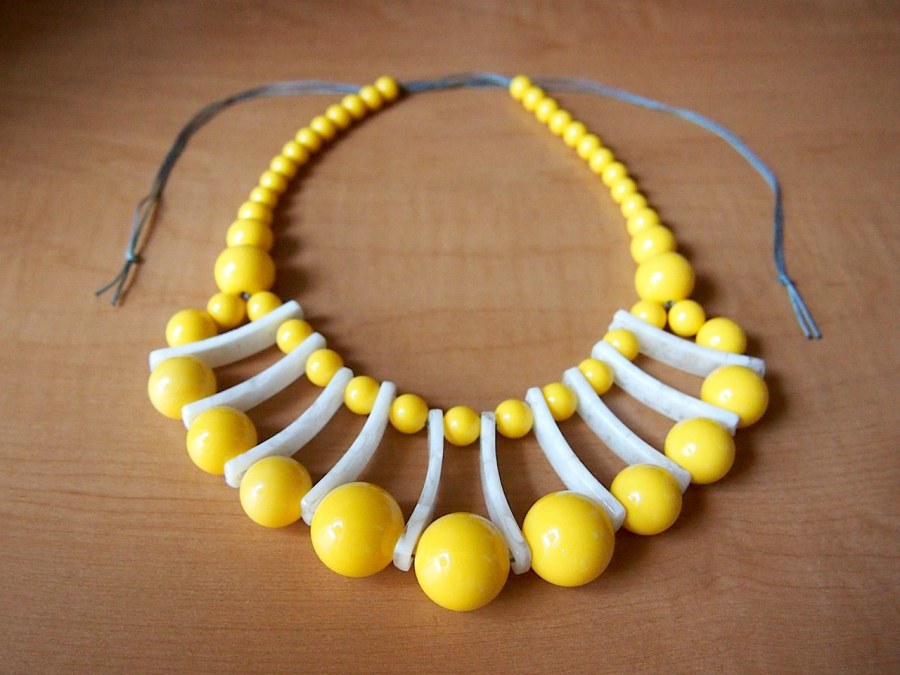
- after getting to that point, i had two gripes: first, the navy cord was too much of a contrast. second, at the point where the cords split up to make a top and bottom, there was too much cord showing on the bottom. the solutions were easy- instead of navy cord, i went with grey, and instead of two small beads on the bottom row, i used one small and one slightly larger bead.
- the adjustable clasp is exactly the same as the one from the crossed cord necklace, and starts with laying out the necklace so the tails are side by side, facing opposite directions.
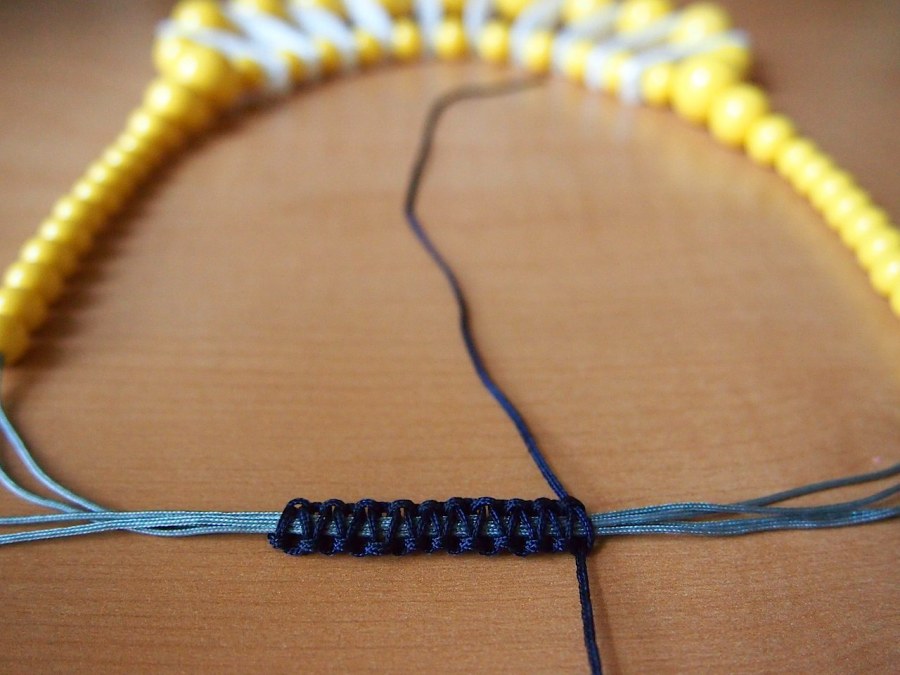
- cut another length of cord (it can be the same color, or contrast). tie a loose square knot around all the center cords. for instructions on how to tie a square knot, click here. add another 9- 12 square knots. keeping them loose will help with the next step.
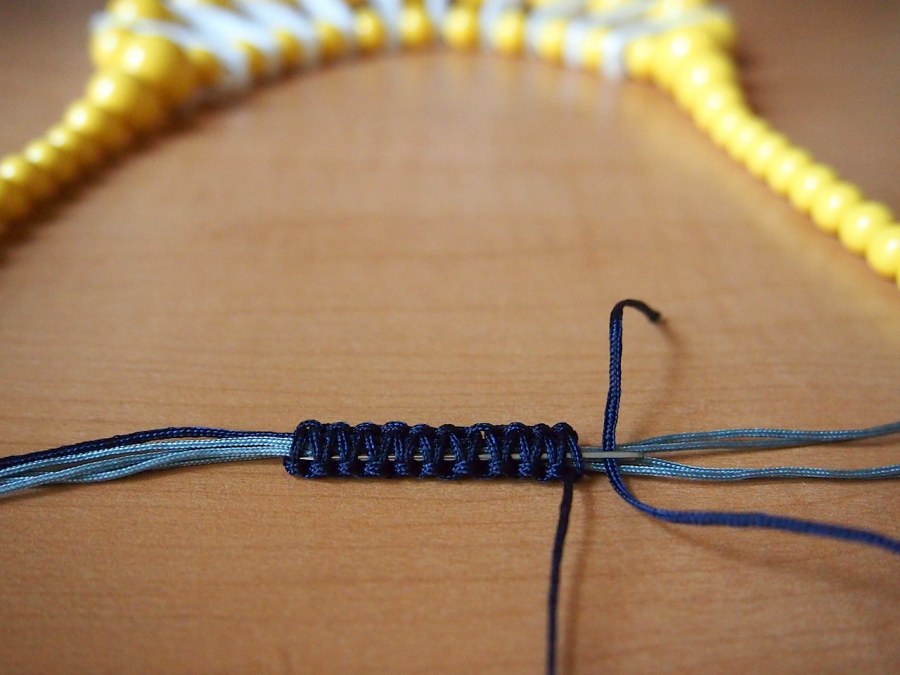
- use a tapestry needle to pull the tails back through the knots.
- go back and tighten the knots by using the dull end of the needle to gently pull the loops on each side. start at the first knot, and work your way to the last. pull any excess though all the knots at the tails.
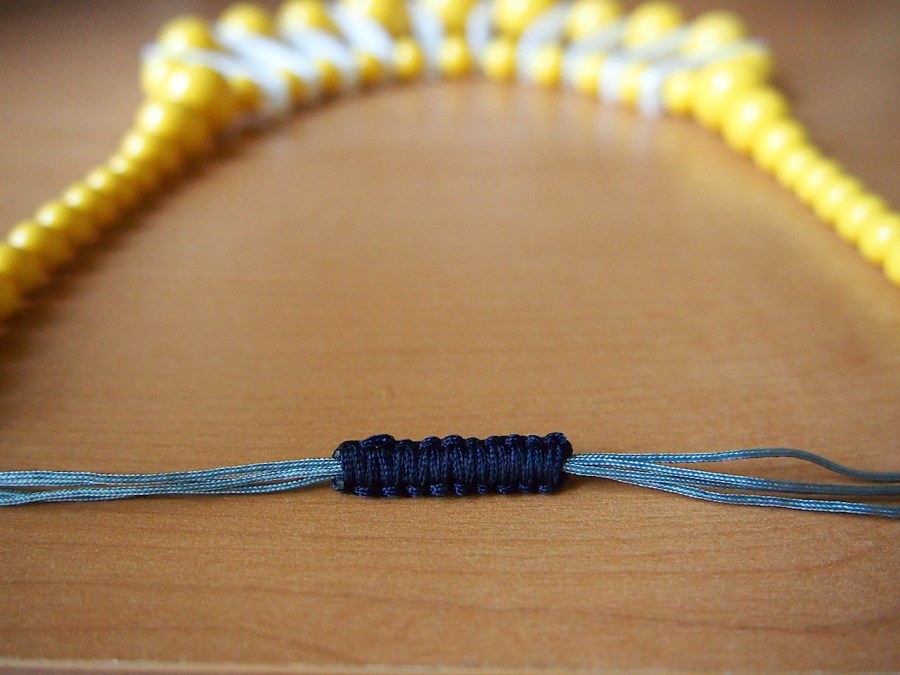
- trim the excess cord, and very very carefully, melt the tips with the lighter. press the melty tips against the knots to secure.
