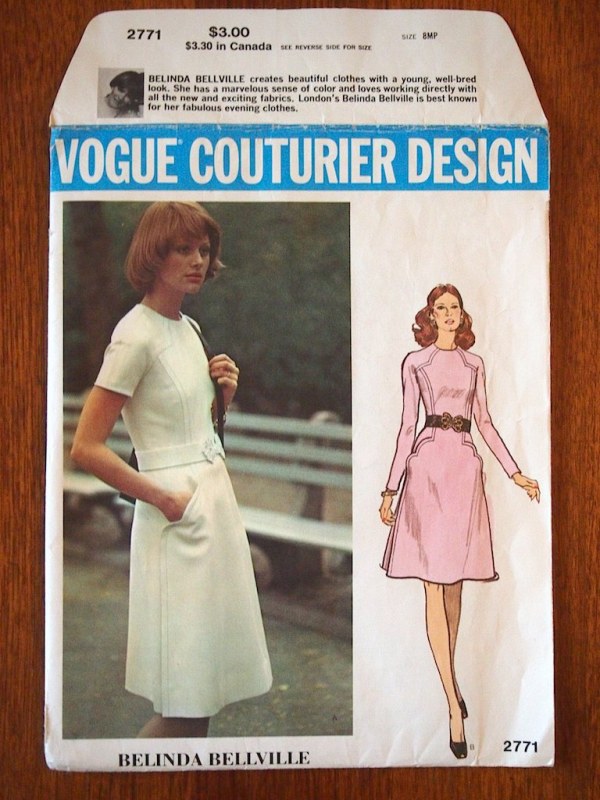
vogue couturier 2771- chapter 1
September 27 2013, 9:38 pm
time to get real.
after an extensive muslin construction, it was time to cut the real deal. the real deal in this case is a medium weight double faced wool, with just enough lycra to give it phenomenal stretch. this fabric was chosen because both sides are finished, so it doesn't require lining. the weight and drape are similar to a ponte double knit. it doesn't unravel easily, which is important when clipping the corners.
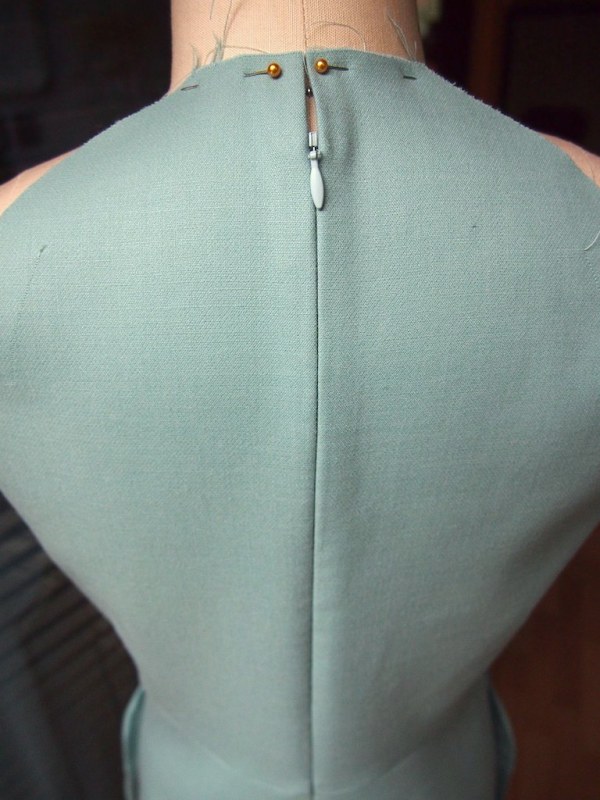
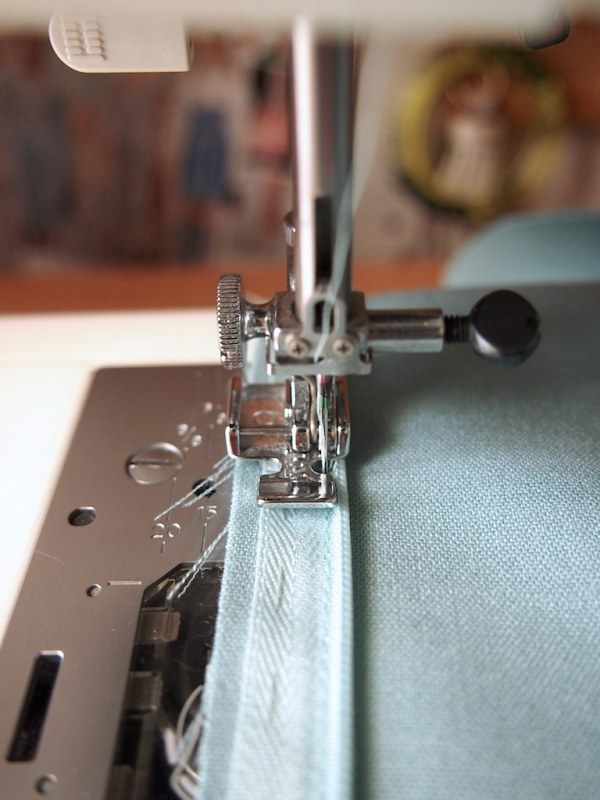
invisible zipper:
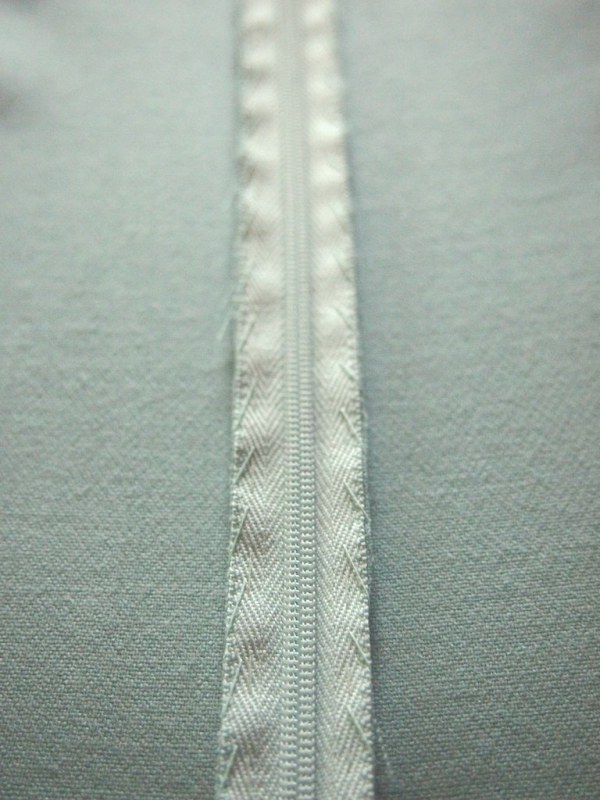
- the muslin was snug in the bodice (to say the least), so instead of the 5'8" seam allowance the pattern called for, i used a 1/2".
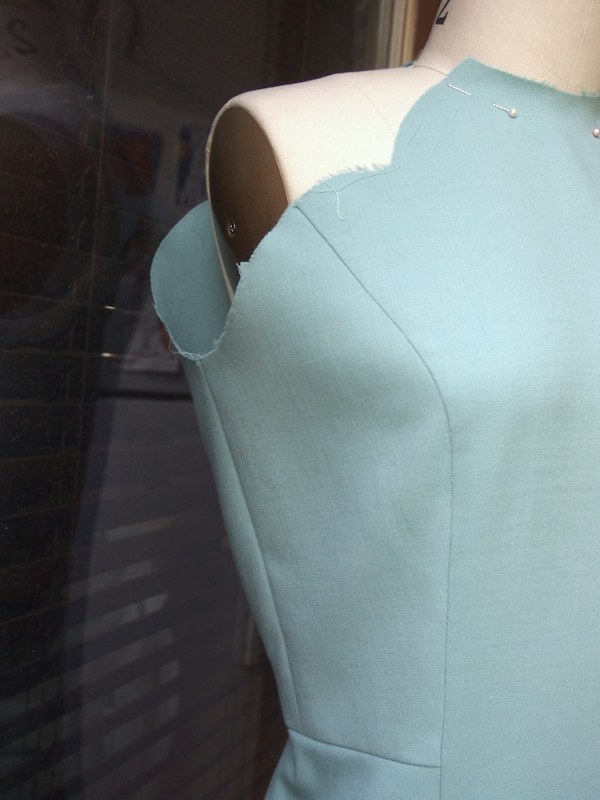
- the original neckline is very tight, so in the muslin, it was opened 5/8". for most of the pattern alterations, i cut the pieces out with the revised measurements- not so with the neck. there are 7 pieces that form the neckline, and trying to change each one is more complicated that altering it once they're all sewn together. keeping in mind that the neckline has an extra 5/8" all around, the zipper was placed lower to line up with the final opening.
- the cheap invisible zipper foot was acting a fool, so i used the regular zipper foot instead- and it worked fine. the procedure went as follows: open up zip, and place the coils along the seam line. baste the zip to the seam allowance by hand. carefully press the zip flat. with the zipper foot, stitch the zipper to the seam allowance as close to the teeth as possible. repeat on the other side.
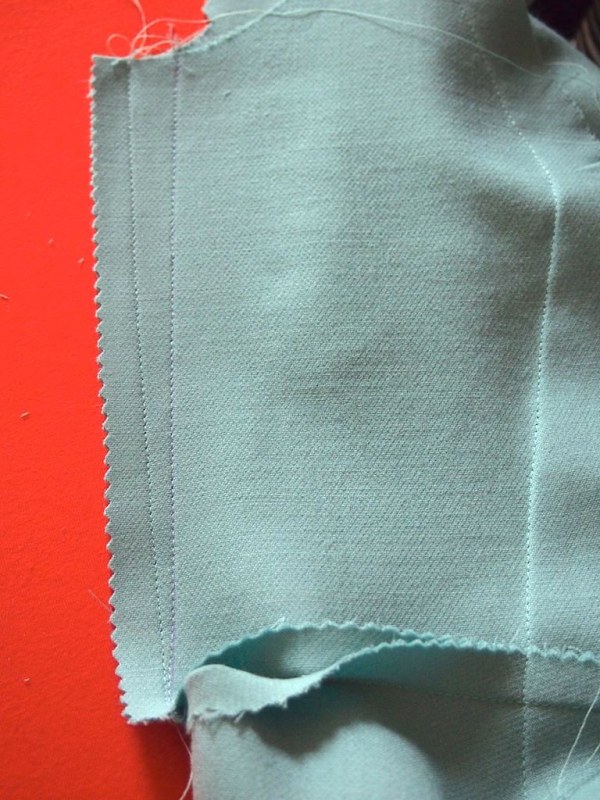
- because the dress is unlined, the back seam needs some finishing
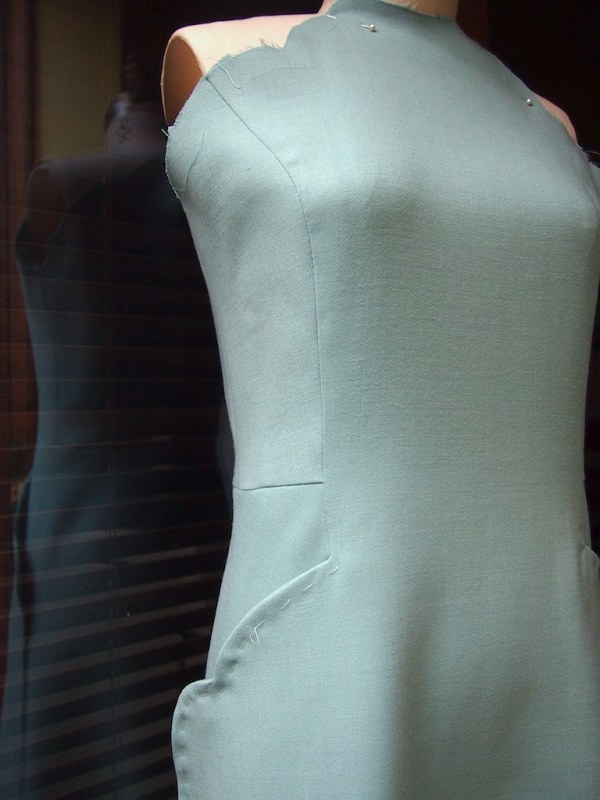
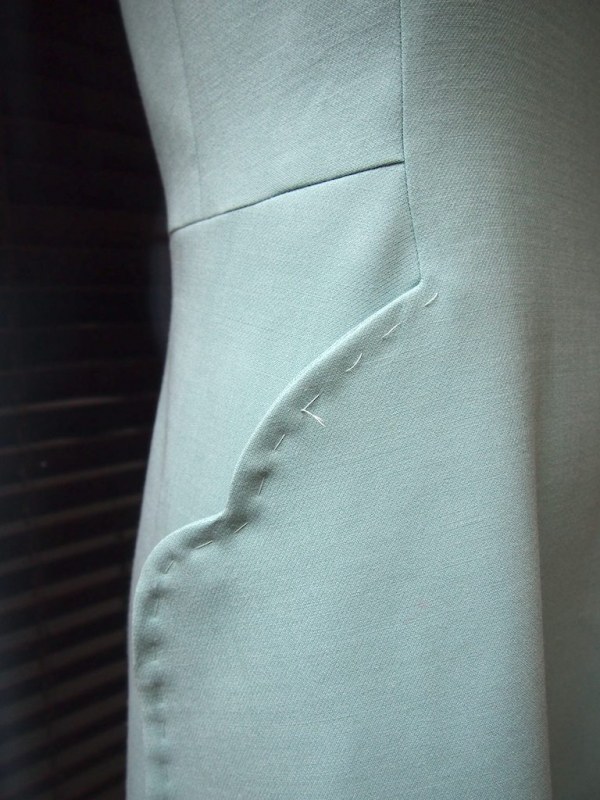
princess seam/ scallop pocket:
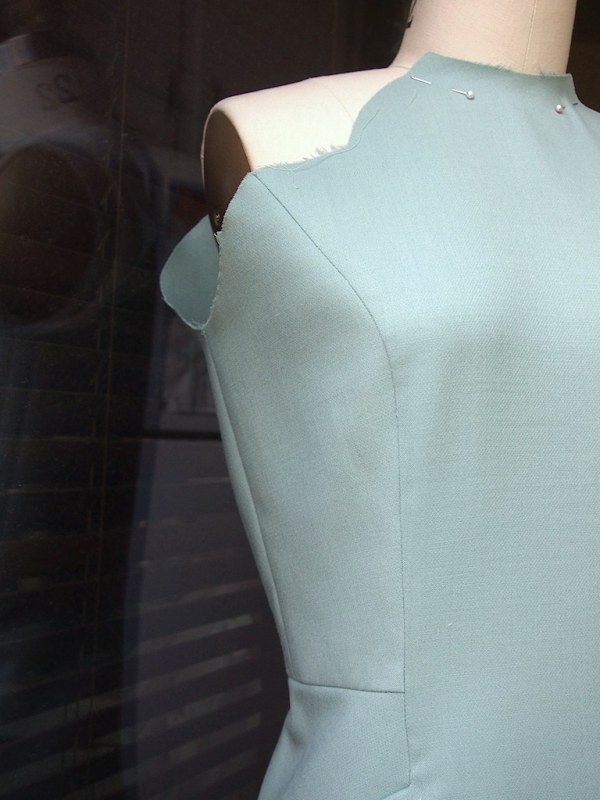
- this seam gave some issue in the muslin, particularly at the rounded part of the bust. the wool fabric didn't have nearly the same amount of trouble, and was very forgiving (thank you lycra). the corner where the princess seam meet the pocket was also a troublesome spot in the muslin, but not so much in the wool.
- even the scalloped pocket edge, wasn't terrible. it has a loose basting stitch holding it together at this stage until the final hand topstitching is applied.
side seam alterations:
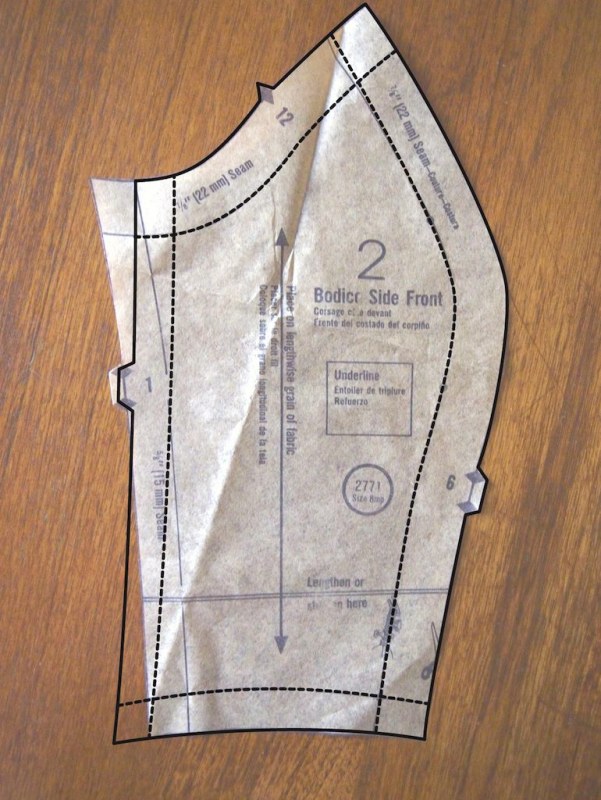

- this seam was altered twice. before cutting, 5/8" was added to the lower edge of the front and back bodice pieces. this was a particularly tight area of the muslin, and adding that extra 1.25" made all the difference. the waistline fit perfectly, but under the arm was quite a bit of excess fabric.
- this was an issue with the muslin as well, but i thought it would even out with the additional width at the bottom. of course, it didn't. once tried on, it became obvious that this area would need 5/8" taken out at front and back. naturally, the waistline seam had to be pulled out before the side seam could be adjusted.
- in the end, the pattern piece should look like what's outlined above. wider at the waist, tighter at the bust. totally sweet.
- next up: adding the sleeves, finishing the neckline, and hemming.
