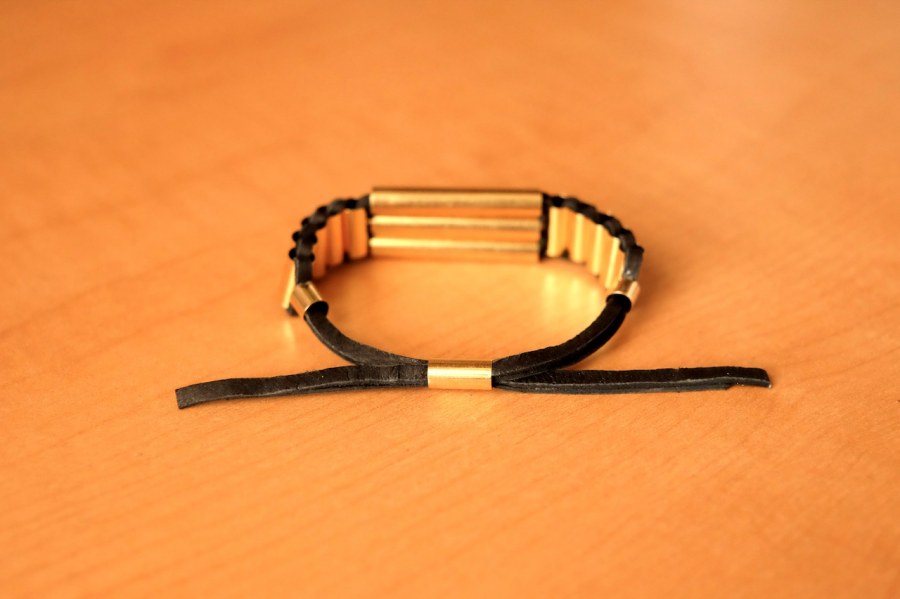
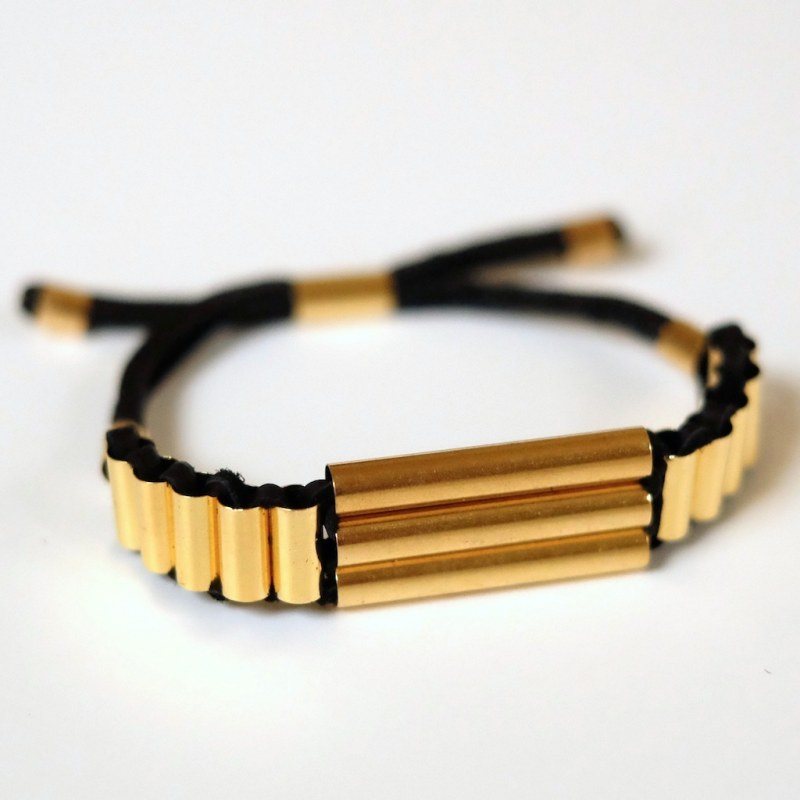
woven brass tube bracelet
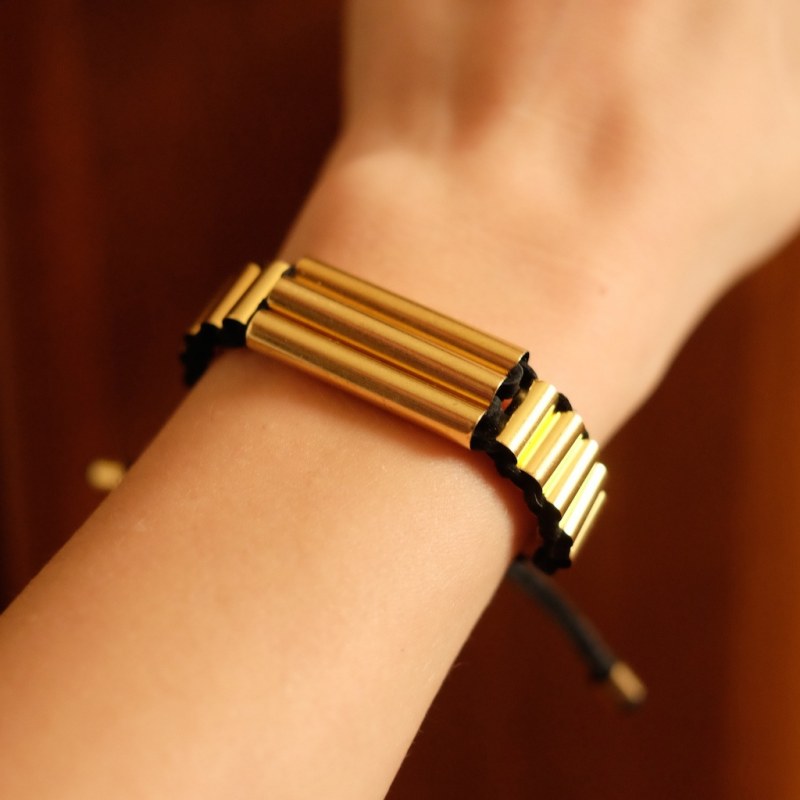
this adjustable bracelet looks much fancier and more complicated than it actually is. the assembly is pretty effortless and takes less than hour, easily. the most painful part is waiting for the glue to dry. i have rather scrawny wrists (about 5" around), so 15" and 15.5" cords with 10 10mm tubes worked well- they end just at the sides of the wrist. for larger wrists, add a few more 10mm tubes and increase the length of the cords- just make sure that one cord is .5" longer than the other.
materials:
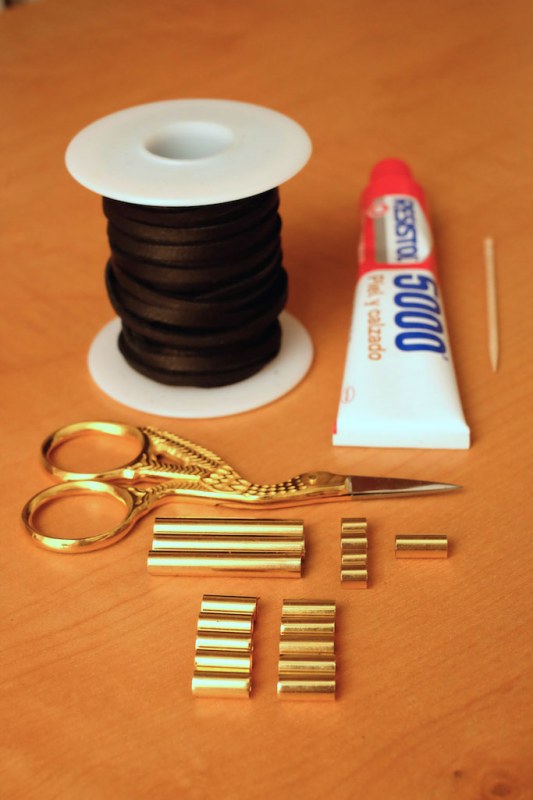
- 3mm flat cord, cut into two strands: 15-18", and 15.5-18.5"
- scissors
- 3 15mm x 4mm brass tubes
- 4 5mm x 4mm brass tubes
- 11- 15 10mm x 4mm brass tubes
- leather glue (clear drying), toothpick
note on cord: this one is deerskin, but you could easily use a synthetic. just make sure that it's flat if you plan to glue them together at the end.
note on glue: the one used here was purchased at chedraui in mexico, and worked well on both the leather and the brass. test out the glue you use to make certain it will hold the brass securely, or use a metal specific glue for the brass pieces.
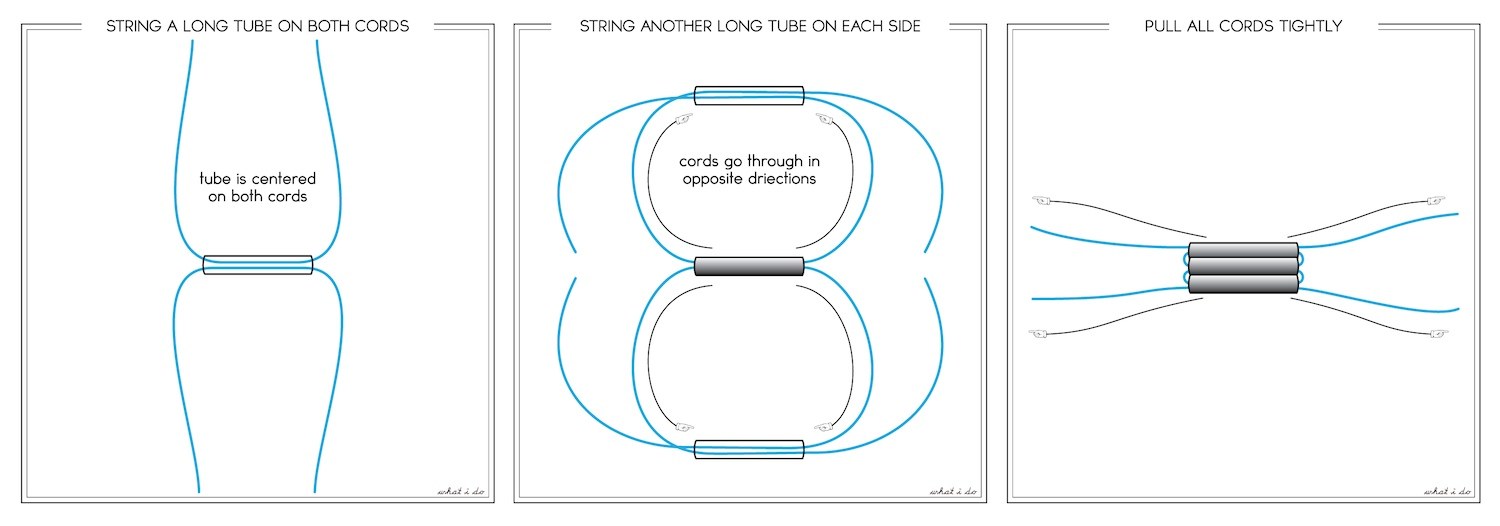
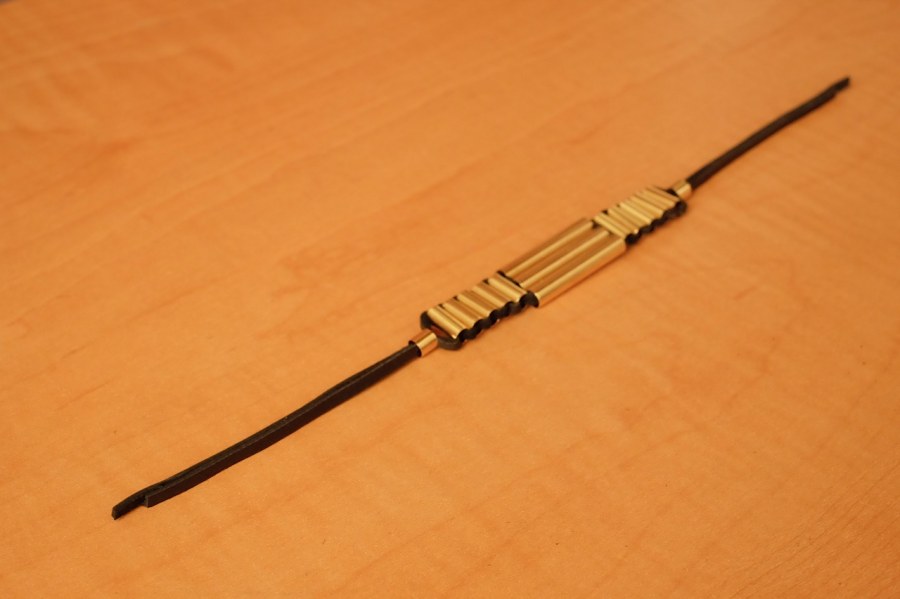
weaving the center:
weaving the sides:

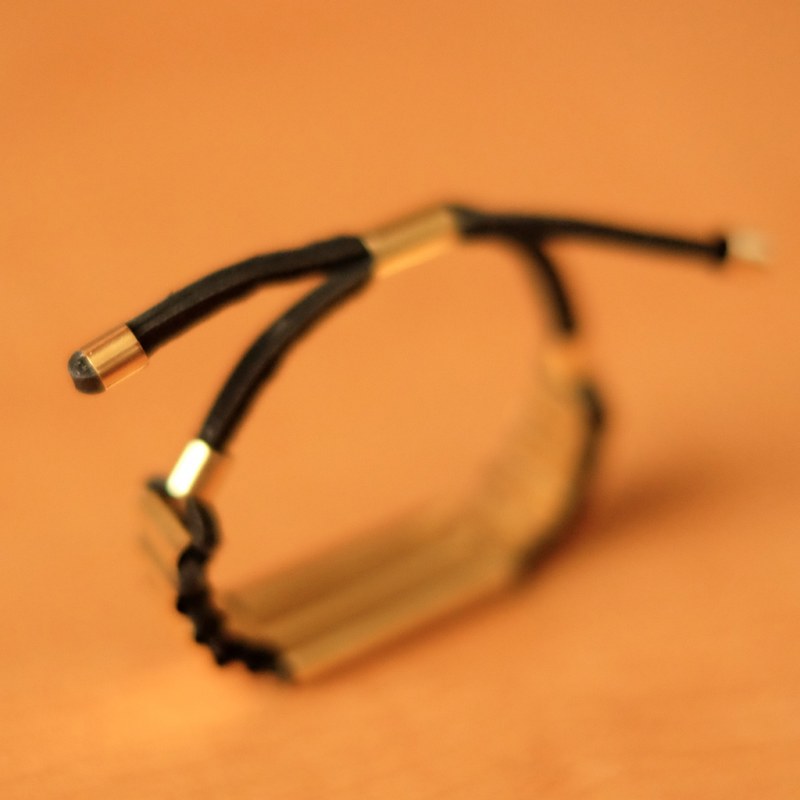
finishing:
- using the toothpick, add a very thin layer of glue to the inside of the cords (on each side, one cord should be slightly longer than the other). press them together, allow to set according to glue instructions.
- add a small brass tube to each side, and glue at the point where the cords meet. allow to set.
- slide a medium tube on one side, then in the opposite direction, push the other side through.
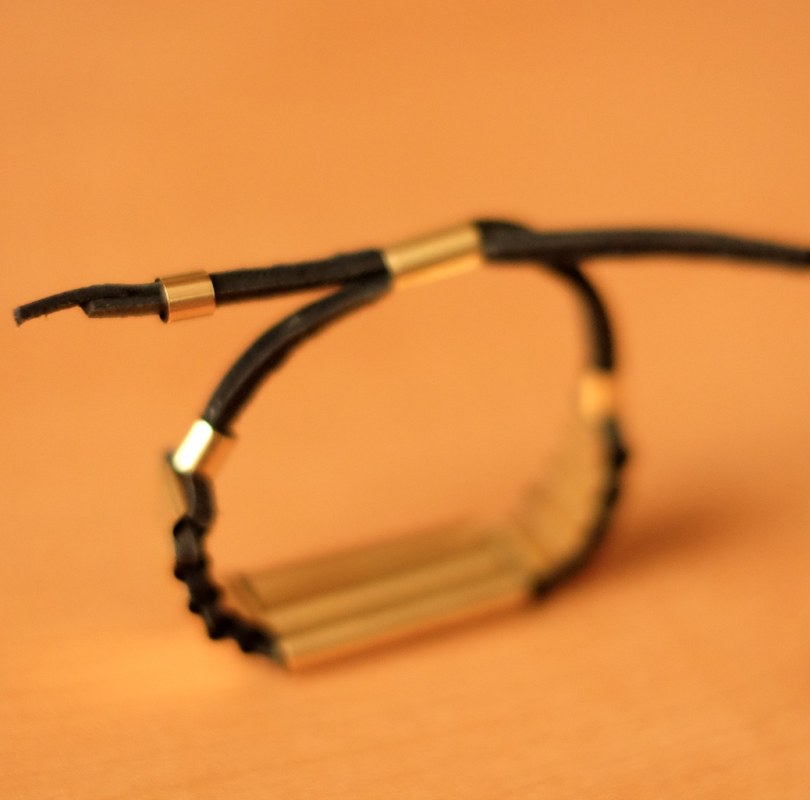
- slide a small tube on each side.
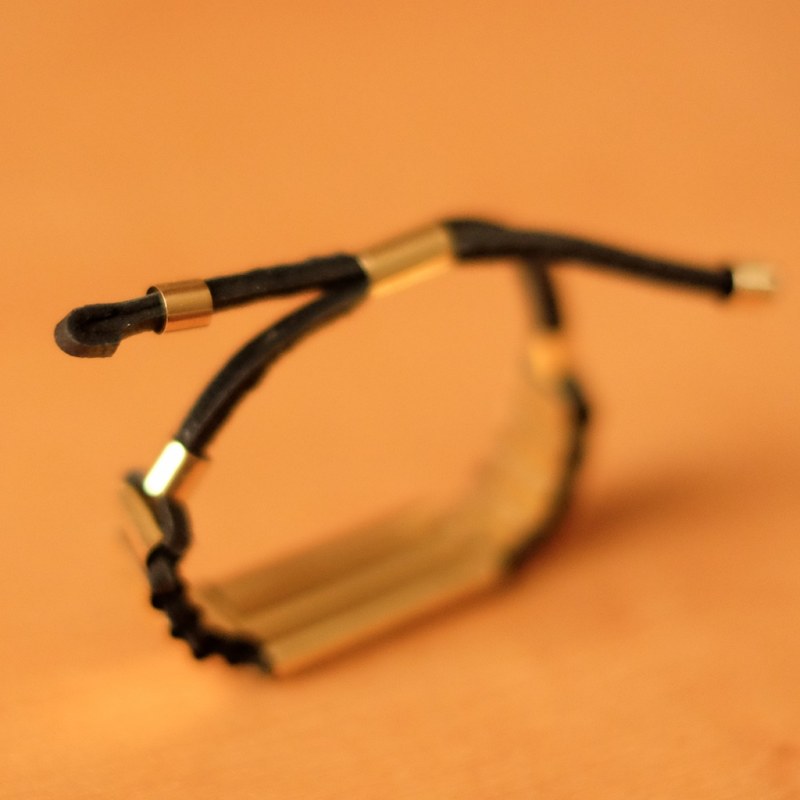
- add a thin layer of glue to the longer strand, and fold it over the shorter one.
- add a thin layer of glue all around the thickest part of the strands, and slide the tube over that area. allow to set according to glue instructions.
done!
